- Skip to main content
- Skip to primary sidebar
- Skip to footer
The Boat Galley
making boat life better


An Easier Way to Splice Double Braid
Published on April 30, 2018 ; last updated on May 1, 2023 by Carolyn Shearlock

It all comes down to the fid. Simple.
We had to replace our spinnaker halyard after Hurricane Irma, and our experience with our first double-braid splice told us we didn’t want to do a second. So we called on our friends at Keys Rigging , in Marathon, Florida.
They said sure, they could do the splice. But why didn’t they teach us an easier way to do one at the same time? Sounded like a good deal to us.
The first thing they said was that standard fids are hard to use (yeah, I’ll agree). They make their own from the center strand of 1×19 rigging wire — you need a piece 18″ or so long. You can get one from the scrap pile at any rigging shop. Fold it in half and tape the ends together. Make sure that the fold is a sharp 180° turn — the closer together the two wires, the easier it will be on the second fid pass.

I’ll be referring to the directions given by Jamestown Distributors here for the initial measuring of the line. If you don’t have a traditonal fid (and why would you since you just made your own?), here’s a handy chart of fid lengths .
Do Step 1 and the first part of Step 2 in the Jamestown instructions, where you pull the core out of the cover. Don’t tape the ends as they suggest. Next, you’re going to taper the cover. From Mark C, go one “fleck” towards the end of the line and pull two strands of the cover out on each side of the line. Do this at every fleck to the end of the line. It’ll look something like this (you can use a needle, paper clip or even the tip of a pen or pencil to pull the strands out. Cut them all off flush with the cover.

Then make Marks 1, 2 and 3 as per the Jamestown instructions.
Put the folded end of your homemade fid into the center of the core at Mark 3 and out at Mark 2.

Thread the tapered end of the cover through the “eye” of the fid.

Pull the fid back out through Mark 3 until Mark A on the cover (the mark just above where the taper starts) is at Mark 2 of the core (letter marks are on the cover, numbers on the core). Where Mark A and Mark 2 meet is called the crossover point. It’s critical that these marks line up, so put a needle or paperclip through the cover and core at this point.

Put the fid in at Mark D and out at Mark C. Be very careful to put the fid between the cover and core and not snag either one of them (snagging either one will make it almost impossible to get the core through). Thread the loose end of the core through the eye and pull the whole fid back to Mark D until the core comes out.

This is really tough. You’re going to say something along the lines of “I thought this was an easier way to splice!” Trust me, it’s considerably harder with a traditional fid. Just keep pulling. Every so often, stop and bend the line back and forth where the tip of the fid is — this will help loosen the cover. Still, once the tip of the fid gets to the point where the cover already has the core in it, it’ll be tough. I bent my fid into an “L” so that I could stand on it while pulling.

Finish with Steps 6 and 7 from the Jamestown directions. I find that it’s best to use a cleat or winch on the boat to hold the end of the line — those are the sturdiest points on most boats.

And check out our other courses and products

Find this helpful? Share and save:
- Facebook 453
- Pinterest 4.7K
Reader Interactions
Anonymous says
April 30, 2018 at 11:57 am
April 30, 2018 at 6:32 pm
Being way too cheap to buy one, I also made my own splicing needle (fid). I used the copper core of some heavy duty Cable TV wire, and epoxied it into a handle made out of the handle-ish-looking shipping spacers from our new washing machine. Works like magic.
April 30, 2018 at 7:09 pm
Another good source for the wire 😀
June 1, 2022 at 2:43 pm
It just moved https://support.jamestowndistributors.com/hc/en-us/articles/360052068854-Splicing-guide-double-braid-eye-splice
Bob Petrasek says
October 12, 2020 at 7:43 pm
Jamestown Distributors does not appear to have a downloadable PDF. of the instructions that you mentioned. They appear to have switched to YouTube videos. They are not clearly explained. Any other sourced that you would recommend?
Carolyn Shearlock says
October 13, 2020 at 1:30 pm
Oh darn! No, I don’t have an alternate source.
David Sliwkoski says
October 28, 2020 at 8:17 pm
I’ve used the Samson splicing kit, which comes with 4 or 5 fids and and a pusher. Number one don’t use the directions that come with the kit. There are a number of videos on YouTube that explain how to make the splice. I use the one from West Marine. Number two: before you start milk the cover back then pull it back into place. This will take the tension out of the cover. Once you do the splice two or three times, you will be able to splice double braid of any size in 10 to 15 minutes or less. I find it so simple that I am more likely to splice a line than tie a not.
November 2, 2020 at 4:28 pm
Thanks for the tips!
Jen Fordyce says
March 20, 2021 at 7:43 pm
Hi Carolyn, thank you so much for these instructions, they are so helpful. I have had a couple of goes at splicing without much luck but will to try as I am such I will get there and this info is great. The last photo shows an image that says wash white line twice before splicing, do you recommend this and is that just in cold water without soap. Does the quality/price of the rope make a difference to how hard it is to splice. Would love any advice on this, thanks
March 21, 2021 at 7:42 am
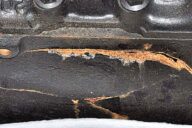
The WASH refers to your HANDS, not the line. The photo above that shows how dirty my splice got from the dirt on my hands.
I don’t know if lower quality line is any different to splice . . . we only use high quality on our boat.
Michael Scipione says
May 11, 2021 at 4:30 pm
the following instruction on burying the core, Mark C is incorrect as it is already buried in the core past the crossover. Picture shows fid correctly coming out mark A (the crossover). i also found that a cable tie in addition to the needle helps hold the crossover.
May 12, 2021 at 7:12 am
Yes, snagging either the core or the cover makes it infinitely harder! Thanks for the fid info. As stated in the article, I find the wire easier than using a fid but everyone has their own preference!
May 11, 2021 at 4:47 pm
Jamestown Instructions suggest they be printed to a pdf file and saved https://support.jamestowndistributors.com/hc/en-us/articles/360052068854-Splicing-guide-double-braid-eye-splice
and a fid length table http://atlanticbraids.com/wp-content/uploads/2018/07/Fid-Lengths-Measurements.pdf
Col Delane says
August 12, 2021 at 3:10 am
“the center strand of 1 x 19 rigging wire” doesn’t indicate what gauge the 19 strands are, as 1 x 19 rigging comes in wire of multiple thickness.
What thickness do you recommend for the DIY fid?
August 28, 2021 at 3:58 pm
I think ours was from 1/4″ wire.
Helge Tepp says
December 28, 2021 at 4:51 pm
That depends on the size of the rope you want to splice. Look up for D-Splicer. You will find several cailibers there. I use these tools in all sizes and they are sturdy enough to do the job nicely. For a mooring line with an eye of 20″ you will either work the splicing as a series of going in, coming up, diving in at the same spot. Or you go for the xxl Modell, I use it all the time, so far up to a gauge of 20 mm.
Leave a Reply Cancel reply
Your email address will not be published. Required fields are marked *
Each week you’ll get:
• Tips from Carolyn • New articles & podcasts • Popular articles you may have missed • Totally FREE – one email a week
SUBSCRIBE NOW
- Questions? Click to Email Me
- Visit Our Store

ACTIVE STORM TRACKER Hurricane and Tropical Storm Information Learn more
Service Locator
- Angler Endorsement
- Boat Towing Coverage
- Mechanical Breakdown
- Insurance Requirements in Mexico
- Agreed Hull Value
- Actual Cash Value
- Liability Only
- Insurance Payment Options
- Claims Information
- Towing Service Agreement
- Membership Plans
- Boat Show Tickets
- BoatUS Boats For Sale
- Membership Payment Options
- Consumer Affairs
- Boat Documentation Requirements
- Installation Instructions
- Shipping & Handling Information
- Contact Boat Lettering
- End User Agreement
- Frequently Asked Questions
- Vessel Documentation
- BoatUS Foundation
- Government Affairs
- Powercruisers
- Buying & Selling Advice
- Maintenance
- Tow Vehicles
- Make & Create
- Makeovers & Refitting
- Accessories
- Electronics
- Skills, Tips, Tools
- Spring Preparation
- Winterization
- Boaters’ Rights
- Environment & Clean Water
- Boat Safety
- Navigational Hazards
- Personal Safety
- Batteries & Onboard Power
- Motors, Engines, Propulsion
- Books & Movies
- Cockpit Confessions
- Communication & Etiquette
- Contests & Sweepstakes
- Colleges & Tech Schools
- Food, Drink, Entertainment
- New To Boating
- Travel & Destinations
- Watersports
- Anchors & Anchoring
- Boat Handling
- ← Seamanship
How To Splice Double Braid Line
Advertisement
Mooring warps, halyards, sheets, and plenty of other lines aboard all use double braid. Avoid weak knots by learning how to add an eye splice yourself.
Knots in lines are fine for occasional use, but a splice is better for more permanent use. A splice looks more seaman-like and doesn't affect the strength of the line nearly as much as a knot. Many lines these days are what are known as double braid — essentially an inner core with a cover on the outside. The core and cover share the load equally. Here's how to put an eye splice in double-braid line.
Technical Support
Degree Of Difficulty: Moderate to high
- Double braid splicing fids
- Masking tape
- Permanent marker
- Double-braid line
Time: About 30 mins, but you will get faster with practice.
Cost: Nothing, if you already have the tools and materials. A set of five good quality fids is around $50.

1. Tie a slipknot about 15 feet from the end of the line, and loop it over a winch or cleat to hold it. Make a mark on the line one fid-length from the end .

2. Form a loop or eye to the desired size then place a second mark opposite the first.

3. Using a small fid, separate the strands of the cover at the second mark and pull out the core. (If the end of the line was melted when it was originally cut to length, trim this off with a sharp knife so the core moves freely.) Lay the cord and the cover alongside each other.

4. Mark the core where it comes out of the cover (your third mark), then pull out a couple feet more and place a fourth mark on the core two-thirds of a fid length from the one you just made. That's where you will be inserting the cover into the core.

5. Wedge the end of the core into the hollow end of a fid that matches the diameter of the core , then push the fid into the cover at the first mark. Work the fid down so that it exits the cover 1 to 2 inches past where the core exits.

6. Pull about 6 inches of the core out of the hole. This begins to form your loop. Make sure that both sections of core are not snagged on one another and freely move within the core.

7. Now, wedge the end of the cover into the fid, then feed it into the core at the second mark. Work it down one complete fid length before pulling it out of the core.

8. Starting about 4 inches from the end, use a small fid to pull out about 8–10 random strands from the cover before trimming them off with scissors. This creates a neat splice with a taper.

9. Pull on the end of the exposed core as you massage the junction of the core to cover the joint.

10. To finish off the splice, work the cover back up the line until the exposed core with the cover inside pops back into the line. Pull a little on the core still hanging outside the line, trim with scissors, then tug on the eye to set the end back inside the core.
Related Articles
The truth about ceramic coatings for boats.
Our editor investigates the marketing claims of consumer-grade ceramic coatings.
Fine-Tune Your Side Scan Fishfinder
Take your side-scanning fishfinder off auto mode, and you’ll be spotting your prey from afar in no time
DIY Boat Foam Decking
Closed-cell foam flooring helps make boating more comfortable. Here’s how to install it on your vessel
Click to explore related articles
Contributing Editor, BoatUS Magazine
A marine surveyor and holder of RYA Yachtmaster Ocean certification, BoatUS Magazine contributing editor Mark Corke is one of our DIY gurus, creating easy-to-follow how-to articles and videos. Mark has built five boats himself (both power and sail), has been an experienced editor at several top boating magazines (including former associate editor of BoatUS Magazine), worked for the BBC, written four DIY books, skippered two round-the-world yachts, and holds the Guinness World Record for the fastest there-and-back crossing of the English Channel — in a kayak! He and his wife have a Grand Banks 32.
BoatUS Magazine Is A Benefit Of BoatUS Membership
Membership Benefits Include:
Subscription to the print version of BoatUS Magazine
4% back on purchases from West Marine stores or online at WestMarine.com
Discounts on fuel, transient slips, repairs and more at over 1,200 businesses
Deals on cruises, charters, car rentals, hotel stays and more…
All for only $25/year!
We use cookies to enhance your visit to our website and to improve your experience. By continuing to use our website, you’re agreeing to our cookie policy.
- Cruising Compass Media Advertising & Rates
- Blue Water Sailing
- Multihulls Today
- Subscribe Today

How to Splice Your Double Braid Lines
This article by Andy Cross was originally published in Blue Water Sailing.
Marlinspike seamanship is an often-overlooked aspect of sailing. Most cruising sailors know half-a-dozen knots that are applicable in various situations aboard their boats. But, not many sailors know how to splice an eye in double braid line.
Double braid is popular aboard cruising boats because it is long lasting, strong, has relatively low stretch and is inexpensive when compared to high-tech line. Take a look at your running rigging and you will see that double braid is used almost everywhere, from halyards and control lines to dock lines and sheets, and many of those lines have, or need, an eye splice. If you want to add double braid splicing to your bag of seamanship tricks, here is an easy-to-use tutorial to get the job done.
The essential tools for completing a double braid splice are: a length of new double braid line, a set of Samson Aluminum Tubular Splicing Fids (or similar), an awl or marlinspike, a sharp knife, cutting board, sharp scissors, masking or Marlow tape and a black Sharpie (silver if marking black line). Note: Do not splice used line; even if it has been wet and dry once, it will be very hard to work with.
When you set up to make the splice, tie a knot about six feet back from the bitter end of the line. It is a good idea to anchor the knot to something sturdy such as a cockpit cleat or sheet winch. A solid anchoring spot for the line will make the last steps of the splice easier. Lay out your line on a flat surface and choose one fid that is the same diameter as the line you will be splicing and one that is the next size smaller. Now you’re ready to splice.
Step One: Marking the Cover (fig: 1,2) Measuring and marking the cover and core is absolutely essential to getting your splice to work correctly. Using a fid that is the same diameter as the line, measure one fid length from the end of the line and make your first mark (Mark A). From Mark A, measure your desired eye size and make Mark B. Note: If you are attaching a shackle inside the eye, make the eye slightly larger than you think you’ll need. In most cases, the splice shouldn’t be tight against the hardware. From Mark B, measure one fid length down the line and make Mark C.
Step Two: Extract the Core (FIG: 3) At Mark B, use your awl or marlinspike to retrieve the core from inside the cover. It helps to bend the line sharply to get started and be careful not to snag any strands of the cover as you remove the core.
Step Three: Marking the Core (FIG: 4,5,6) Once the core has been extracted, push the cover towards the knot and then milk the cover back towards the bitter end. This helps to separate the cover and core, which will make the remaining steps easier. Where the core exits the cover make Mark I.
Now push the cover back towards your knot to expose a few feet of the core. From Mark I, measure half-a-fid length and make Mark II. From Mark II, measure one fid length and a half and make Mark III.
Inserting the Core into the Cover (FIG: 7,8) Now you are going to start the actual splice, which will seem a lot like a Chinese finger trap. Tape the end of the core, cut it at a 45-degree angle and tape it to a fid that is one size smaller than the diameter of the line. Try not to use too much tape as it will make the core harder to pass through the cover.
Insert the fid at Mark A and milk it down the line until the tip of the fid reaches Mark C. Remove the fid and that section of the core at Mark C. If you are installing hardware, pass the fid and core through the hardware before inserting the fid at Mark A. Note: Because the core is doubled up inside the cover between A and C, this part of the splice can be difficult. Take it slowly to ensure the fid does not detach from the core.
Step Five: Inserting the Cover Inside the Core (FIG: 9,10) Tape the end of the cover and cut it off at a 45-degree angle, then tape the end to the fid that was used for measuring and marking.
Insert the fid into the core at Mark II and pull it out at Mark III. Now pull the cover tight against the core and visa versa. This is called a crossover and should be snug.
Step Six: TapeR and Bury the Cover and Core (FIG:11,12,13,14) Pull the cover out of the core as much as possible, remove the tape and fid and splay out the cover about a half to one full fid length. Then use scissors or a knife to taper the splayed out strands. Once the cover has been tapered, milk the core over the tapered ends.
Now you are going to basically do the same thing with the cover coming out at Mark C. Pull the core through until the tapered ends of the cover inside the core just meet the crossover. Next, grab the core where it comes out at Mark C, pull the core out about a half a fid length or more and cut it at the spot where you initially grabbed.
Then, splay out the core strands and cut a taper into them. Once they are tapered, milk the cover over the tapered core. Note: Tapering is important. If not tapered well, the core will have an abrupt end to it inside the cover, which will create a weak spot in the line.
Step Seven: The Final Bury (FIG: 15,16,17,18) The last step in the splice is to suck the core and tapered cover inside the line.
Make sure that your line is securely anchored and then pull back on the line. While keeping constant pressure on the splice, milk the cover from your anchoring point back towards the splice and over the core and tapered cover. Try to keep slack out of the cover that forms the eye. If you end up with a bit of core showing, put a bar or handle of a hammer through the loop and give it a couple swift tugs to snug up the splice. Don’t be afraid to use force. If the splice is done properly, the core will not, and should not, be visible.
A double braid splice certainly isn’t the easiest thing to get perfect on your first try, so don’t get frustrated. Buy some extra line and practice until you are satisfied with the result.
When you get the hang of it, you’ll be looking all over your boat for places to add a splice and trading the service with fellow cruisers. Plus, learning to splice your own running rigging is immensely satisfying and can save you a few dollars at the boat yard.

Administrator
You might also like.

Problems with Paint Application Q & A

Dinghy Security
Winterizing Your Engine

Read the Summer-Fall Edition of Blue Water Sailing
Read the fall 2023 edition of blue water sailing, recent posts.

- Lagoon Introduces New 60-Foot World-Girdling Family Cruiser

- Excess 13 Cruising Cat Design Launch Refines the Brand’s DNA

- Fountaine Pajot Introduces New Sustainable, Affordable 41-Foot Cruising Cat
Please Visit Our Sponsor’s Webpages

- Media Advertising & Rates
Published by Blue Water Sailing Media, a division of Day Communications, Inc., Middletown, RI
Publisher & Editor: George Day
Blue Water Sailing Media publishes Blue Water Sailing magazine, Multihulls Today and other titles.
Cruising Compass Advertising Sales:
George Day, Newport, RI [email protected] 401-847-7612
- Survey of the Week
© 2014 Blue Water Media. All rights reserved. | Admin
Splicing Instructions
Everything you need to know about splicing, what is splicing.
A splice is a way of terminating a rope or joining two ends of rope together without using a knot. Apart from being bulky and unsightly, even a correctly tied knot can cause significant loss of strength to a rope. At Marlow our splicing team have over 150 years of combined splicing knowledge and experience and we offer a splicing service to our trade and commercial customers for bespoke rope assemblies, slings and strops. For sailors and boat owners, we always recommend using your local rigging professional to splice and install your ropes. Find your local Marlow Rigging professional here.
For those wishing to splice their own ropes, we have produced a comprehensive splicing guide and range of splicing tutorials (scroll down to view) detailing a range of splicing methods. For hands-on splicing demonstrations, visit the Marlow stand at any of our shows and exhibitions throughout the year, or sign up to attend a Marlow Rope-Show held across the UK at sailing clubs once per month.

SPLICING TOOLS
When learning to splice, the right tools will make the job much easier. Below is a list of common splicing tools available through your Marlow dealer
Swedish fids are used primarily for 3 strand and multiplait splicing. They also aid Marlowbraid and D2 Racing splices.
Braid on Braid Fid Set – Selma fids are used primarily for doublebraid, D12 and D2 splices, but can also be used to aid 3 strand and marlowbraid splices.
Splicing Needles – Large and small used for Marlowbraid, D2 Racing. Can also be used for the doublebraid splice.
Excel Control Splicing needle – Used primarily for Excel Control and Excel D12 2.5 and 3mm.
Other tools and equipment – Sharp knife and/or scissors, tape measure, permeant marker pen, splicing (or insulation type) tape, strong point on your work bench, hot knife or flame for sealing the rope.
View our range of Splicing Accessories
Splices vs knots.
Splices: Most Marlow ropes can be spliced, this is normally the preferred method of termination. A good splice using the recommended method should not reduce the strength of a rope by more than 10%.
Knots: A knot will reduce the strength of the rope, sometimes very significantly. This loss is caused by the tight bends and compression found in any knot. The amount a rope will be weakened will depend on the knot, type of rope and the material from which it is made but can be up to 60%
Eye Sizes: Wherever possible the angle formed at the throat of a splice when it is loaded should be 30 degrees or less. This means that the length of the eye when flat must be at least 2.7 times the diameter of the object over which the eye is to be used and the distance from the bearing point to the throat when in use should be at least 2.4 times the diameter. Some materials like Aramids and HMPEs (Dyneema) will require a larger eye with an angle at the throat of 15 degrees or less.

SPLICING TUTORIALS
D2 covered eye splice.
D2 Covered Eye Splice – D2 and V2
Used for core dependent rope constructions such as D2 Racing, V2 etc. Designs where the core contributes most or all the strength and the cover provides protection to the rope.
Skill rating: Advanced 4/5
Locking Eye Splice – one end free
A popular starting splice great for beginners and one that is most common for locking Dyneema splices. This versatile splice can be applied in all applications where a lock is required.
Skill rating: Beginner 2/5
EXCEL control Continuous Loop Splice
Control Line End-to-End – Control Line.
The Excel Control Line Continuous Loop splice is specifically designed to make endless loops useful for kicker, cunningham and outhaul systems. Marlow’s Control Line has a tough, strong cover that takes much of the load bearing duties and a small polypropylene core that is designed to be sacrificed in this very neat end-to-end slice.
EXCEL R8 Taper
Excel R8 Taper – Excel R8
A Taper splice is useful in areas of rope that don’t require handling, for reducing friction and when needing to change the diameter of the line. Marlow’s high performing Excel R8 is the perfect rope for this type of splice available in 4-8mm diameters either working as a halyard or high performance sheet working well in ratchet blocks.
Skill rating: Intermediate 3/5
How to make a Soft Shackle
Soft Shackles are a great skill to master and they can be made in all shapes and sizes suitable for a variety of applications and fastenings. This quick and easy tutorial will guide you step by step.
If you are new to diamond knots, this part may take a bit of practice, however, the splice is quick and easy. Made with Dyneema, Marlow Soft Shackles have incredible breakload strength and are a worthy addition to your climbing or sailing kit, for use at home, outdoors or wherever you may venture.
Skill rating -Splice 2/5 | Diamond knot 4/5
Double Braid Splice
Doublebraid heat set rope combines industry-leading strength and stretch resistance with a flexible, user-friendly feel. Ideal for yacht sheets and splicing, its heat-treated design minimises stretch for both high-load and everyday use. This all-around rope offers exceptional performance.
With easy splicing removes the need for bulky knots which also reduce a ropes strength.
Our Membership

Marlow Ropes
Marlow Ropes Ltd, Ropemaker Park, Diplocks Way, Hailsham, East Sussex BN27 3GU UK
Connect with us
We use cookies on this site to enhance your user experience. for a complete overview of the cookies used, see our cookie policy ., welcome to marlow ropes.
If you’re looking for information about Marlow Ropes in the USA, please select below.
- Competitions
- British Yachting Awards
- Southampton Boat Show
- Print Subscription
- Digital Subscription
- Single Issues
- Advertise with us
Your special offer
Subscribe to Sailing Today with Yachts & Yachting today!
Save 32% on the shop price when to subscribe for a year at just £39.95
Subscribe to Sailing Today with Yachts & Yachting!
Save 32% on the shop price when you subscribe for a year at just £39.95

Splicing: Double braid eye splice
In the second of a six part guide to splicing, sailing today takes a look at a double braid eye splice, a neat-looking but tricky splice..
Double braid lines with a polyester core are commonly used for a variety of low stretch running rigging roles such as halyards, reefing and control lines.
This splice is a real money saver as there are potentially a lot of these splices within a yacht’s running rigging. Don’t try your first time on used rope. New rope is more slippery and hasn’t yet been stretched and compacted between core and cover, so is much easier to work and splice. Also thicker rope is less fiddly to work, with more space between core and cover, so try your first splice on 12mm diameter or larger.
See our guide to a three-strand eye-splice here.
Hitch the line to something solid two or three metres back to stop the core and cover slipping beyond this point
Cut off melted end and using a marker pen, mark rope, (A), 25 times the rope’s diameter from its end
Mark (B) two and a half times the rope’s diameter from mark (A) towards the end. (B) marks one side of the eye’s neck
Lay the loop the size you want and make mark (C), where you want the other side of the splice’s neck, opposite (B)
Using the end of a fid, tease out the core of the rope at point (C). Mark the core, (D) at the point it came out
Pull the core out at (C) from the end of the rope. Align (D) with (B) and mark the core, (E), level with (A)
Insert a pulling fid about 3in (80mm) up the cover between (C) and the hitch. Tease it carefully down the rope between the core and cover, exiting the rope at (B)
Thread core and cover through any hardware you wish to include in the eye now, such as a snap shackle, then insert half of the core’s end into the fid eye
Carefully pull the fid back through, unhook the core from the fid eye and pull the core further through until D aligns with A and E aligns with B
Now insert the fid into the core 400mm from the rope end and exit at (E). Halve the cover, insert it into the fid eye and pull fid back through core
Cut the end of the cover at an angle. Scissors are easier than a knife. A nice long taper leaves a neater splice
Milk the core back over the cover so the tapered end of the cover pops back inside the core. It should look like this
Now pull hard on the eye and work the cover down and round the eye so there is no longer any core visible in the splice’s neck
Pull the eye tight, then pull 30mm of the core out and cut with a taper. Then work the cover back to hide the end of the core
The finished loop all neat, tidy and ready ready for use
info heading
info content
Buy the latest Sailing Today Follow us on Facebook Follow us on Twitter
No mobile device? Purchase directly on Zinio for your desktop!
RELATED ARTICLES MORE FROM AUTHOR

Anchoring Masterclass: How to Anchor like an Expert

Southampton Boat Show 2024: What to Expect

Steering by the Stars: A Guide to Celestial Navigation
Offering a wealth of practical advice and a dynamic mix of in-depth boat, gear and equipment news, Sailing Today is written cover to cover by sailors, for sailors. Since its launch in 1997, the magazine has sealed its reputation for essential sailing information and advice.
- Telegraph.co.uk
ADVERTISING
© 2024 Chelsea Magazine Company , part of the Telegraph Media Group . | Terms & Conditions | Privacy Policy | Cookie Policy
- Forums New posts Unanswered threads Register Top Posts Email
- What's new New posts New Posts (legacy) Latest activity New media
- Media New media New comments
- Boat Info Downloads Weekly Quiz Topic FAQ 10000boatnames.com
- Classifieds Sell Your Boat Used Gear for Sale
- Parts General Marine Parts Hunter Beneteau Catalina MacGregor Oday
- Help Terms of Use Monday Mail Subscribe Monday Mail Unsubscribe
Splicing yacht braid
- Thread starter Don K.
- Start date Sep 11, 2003
- Forums for All Owners
- Ask All Sailors
I purchased the line and a splicing kit for my halyards, read the instruction booklet and set out to splice. Two hours later I had the fid stuck so tight I could not go forward or back it out. Has anyone sliced with any success?

Stu Jackson
Jim leblanc.
Do you have the right size fid? My experience is that you must use new line (which you have) and must use the right size fid for each size of line you wish to splice. The first couple of times are the most difficult, but don't give up, the results are worth the effort.

newly anonymous
a couple possibilities A few things that beginners might not know about splicing double-braid: 1. Every size line requires a different fid. If someone tries to sell you a one-size-fits-all fid in a splicing kit, run the other way. 2. Stretched line is ten times harder to splice than unused line. Avoid the temptation to tie a bowline in a new line and use it a couple of times before you can get around to splicing it. 3. Taper the cover to make it easier to draw in. Instructions for doing this can be found on page 95 of Chapman's Knots. It makes the job a TON easier. 4. Practice a few splices on a short length of new line before you ruin an expensive new halyard. Most chandleries have a box of "roll remnants," short pieces of new rope you can buy inexpensively. Use the exact type of line to practice that you'll be using for your halyard, because different cores are straight, twisted or braided, and will need to be worked differently. 5. No shortcuts. If your instructions tell you to mark position X with a blue felt pen, use a blue felt pen.
It is so easy..... Don: It is so easy when you watch someone do it. One of our local harbor rats has a son that is a professional rigger. He does a line in about 3-8 minutes (friggin' amazing). I just let him do mine.
Bayard Gross
I've spliced double braided line many times Yale Yatch Braid should be fairly easy to splice, or at least that's been my experience. I assume you are using the traditional fid and pusher tools, but perhaps you are using the Yale splicing device. Nevertheless, I am pretty sure I know where your problem is. I think as you are pulling or pushing the core through the cover to where the core has exited from the cover, you are running into an area that is quite tight as you are trying to push or pull a fid into a cover that already has a core in it. Basically, the last step before you pull things up tight. Now, the instructions may seem to say to continue pushing or pulling the fid down several inches into the cover, a task which I am sure at this point you find impossible. Well it is. I have ended up just pushing or pulling the fid a small fraction of an inch past the point where the core exits the cover where it becomes very difficult to continue pushing or pulling. I exit the fid at that point. I have done this many times with no loss in strength or safety. In fact I recall that there is a book that even instructs in splicing using this method. Another somewhat helpful item is to put talcum powder (baby powder) onto the core. That will make it a little more slippery. Don't try splicing Marlow lines as their covers are much too tight over their cores. New England ropes, especially their high tech lines are also difficult to splice. My favorites for splicing are Yale and Sampson.
Splice the Hard Way or the Easy Way Your Choice. I too was pulled in to this web of deceipt perpetrated on unwary boatowners by corporations selling useless tools. I tried the fids and pushers, a different one for each size rope....they stink and work poorly. I tried a "super snake" tool that worked well but broke in half after the second splice. THEN I INVENTED MY OWN TOOL!!! It is fantastic, is essentially FREE, and works so good I CAN'T believe it!!!! I could make millions on my tool but I posted it here for everyone to share just as my way of giving something back to the community. My tool is posted in the forum archives with a photo. It is made out of a simple coat hanger, it will not break, it works great, and you will love it. You can make it from smaller diameter stiff wire for smaller lines (I was splicing 5/8 and 1/2 inch) which I have also done. The tool is made in less than 5 minutes with a set of pliers and some wire cutters (usually found as part of the pliers). I think I called it Dave's super splicing tool or something if you want to search for it. Good luck Dave
I buy pre- spliced Splicing is like golf you have to do it frequently to be any good. I would rather spend my time sailing so I avoid the frustration (also like golf) and just buy pre-spliced or pay someone to to do it.
John Visser
Its not so bad I've spliced them all: 1. Three strand - nylon nad polyester filament - for my rope lifelines, chain snubber, lazy jacks, and so on. Easiest, and fun adn quick. 2. Double braid - for various purposes. I have hte Sampson fid and pusher kit - over-priced, and I never use the pusher. Takes a little practice, but can come out really nice. 3. Parallel core low stretch, like Sta-Set X, spliced eyes around thimples for halyards. Need a winch to pull these in. Only high strength way of attaching these lines. The "trick" is tha tyou need a tool bag with all of the right stuff - masking tape, permanent marker, scissors, knife (and I have a square of plywood and a hammer so I can cut rope quickly and cleanly with my rigging knife); whipping twines, needles, fids, and a good cigarette lighter and spare can of butane. jv
Splicing kit gets the deep 6 It is a wonder I got as far as I did with the kit I bought. Two fid sizes with a pointed end and one end with a hook. No pusher!!! The hook snagged everything. I like the idea tying a boline so no more splicing except three strand for me. The kit was New England Ropes Uni-Fid II splicing tool.
It's knot that hard Nyuk,nyuk I like splicing. Sta-Set is super easy. I just followed the instructions that came with the fid set. If it said to wrap with tape, I did, mark at 1 inch, I did. Worked each time. Blind ends and thimbles. Sta-Set X is more difficult to work with. Can't make a blind end with that stuff, but did my halyard thimble eyes. I'd rather splice line than polish brite work.
I like doing my own splicing... It connects me with my boat in a personal way. Using splices in place of bowlines (did I see someone call it a "boland"?) gives the rigging a clean look. I have never had a splicing session take away from my sailing. I will bring it home, or do it while watching football on t.v..... I use the fids, one for each size of rope. The biggest problem is keeping the core in the fid while trying to push it through the cross-over area. That's where two sections of core are inside the cover. What I do is use a razor blade to taper the end of the core so it will fit into the fid's end cavity well, then I spirally wrap masking tape around the fid and core to hold it in. Theoretically when I'm pushing the fid through the tight spot, twisting it, etc. the twisted tape is less likely to peel. I don't use the pusher tool much, it destroys the core/fid connection, and it keep thinking it's going to poke through my hand or something else. The talcom powder trick sounds like a good idea. My technique for getting the fid through that long tight section is the same as Bayard's. Inch by inch. That is not to try and push the fid through the whole distance at once, but rather exit the cover when it gets too tight, then re-enter in the same place/hole and continue on. Instead of 3-4 inches of tight pressure on the entire fid, do it one or two inches at a time. It won't hurt the splice. I've talked to a few guys who use the splicing wand. You go in from the back, attach the core to the wand via the adjustable loop and them pull the piece back through. They cost about 40-50 dollars. But I'm cheap, already own the fids, so... why change.
Dave, I can't find your photo of magic splicing tool. Could you please repost it for us? Thanks!
Anyone I found the pic. It's at the link
- This site uses cookies to help personalise content, tailor your experience and to keep you logged in if you register. By continuing to use this site, you are consenting to our use of cookies. Accept Learn more…
Additional Info: We couldn't locate the device. In order to find the nearest Vendor, supply your desired location.
Additional Info: We couldn't locate the device. Unfortunatly your browser seems not to support geolocation. Please supply your desired location.
Additional Info:In order to find the nearest Vendor, supply your desired location.

Suitable for vessels 40 ft and larger.
The Mega Braid form New England Rope combines great look, excellent handling, superb strength and controlled elongation.
- Material: 12-Strand nylon
- Applications: Anchor and dock lines for boats over 40’.
Color variation
Description
Mega Braid’s unique 12-strand, single braid construction offers a combination of good looks, superb handling, excellent strength and controlled elongation. It's flexible and is easy to coil or flake. Comes in 600’ spools or custom spliced.
Applications of our Mega Braid: Anchor and dock lines for boats over 40’.
Technical product data
| Diameter [mm] | Diameter [inch] | Weight [lbs/100'] | Tensile [lbs] |
|---|---|---|---|
| 16 | 5/8 | 9.90 | 10,300 |
| 18 | 3/4 | 14.00 | 13,400 |
| 22 | 7/8 | 17.20 | 21,100 |
| 25 | 1 | 25.80 | 24,900 |
| 28 | 1.125 | 34.00 | 34,900 |
| 30 | 1.25 | 36.00 | 41,000 |
| 36 | 1.5 | 55.50 | 48,000 |
Typing errors and technical changes reserved. The data are typical values without warranty or guarantee. For questions we are always at your disposal
- New Sailboats
- Sailboats 21-30ft
- Sailboats 31-35ft
- Sailboats 36-40ft
- Sailboats Over 40ft
- Sailboats Under 21feet
- used_sailboats
- Apps and Computer Programs
- Communications
- Fishfinders
- Handheld Electronics
- Plotters MFDS Rradar
- Wind, Speed & Depth Instruments
- Anchoring Mooring
- Running Rigging
- Sails Canvas
- Standing Rigging
- Diesel Engines
- Off Grid Energy
- Cleaning Waxing
- DIY Projects
- Repair, Tools & Materials
- Spare Parts
- Tools & Gadgets
- Cabin Comfort
- Ventilation
- Footwear Apparel
- Foul Weather Gear
- Mailport & PS Advisor
- Inside Practical Sailor Blog
- Activate My Web Access
- Reset Password
- Customer Service

- Free Newsletter
Blue Jacket 40 Used Boat Review

Catalina 270 vs. The Beneteau First 265 Used Boat Match-Up

Ericson 41 Used Boat Review

Mason 33 Used Boat Review

How to Create a Bullet-Proof VHF/SSB Backup

Tips From A First “Sail” on the ICW

Tillerpilot Tips and Safety Cautions

Best Crimpers and Strippers for Fixing Marine Electrical Connectors

Polyester vs. Nylon Rode

Getting the Most Out of Older Sails

How (Not) to Tie Your Boat to a Dock

Stopping Mainsheet Twist
Fuel Lift Pump: Easy DIY Diesel Fuel System Diagnostic and Repair

Ensuring Safe Shorepower

Sinking? Check Your Stuffing Box

What Do You Do With Old Fiberglass Boats?

Boat Repairs for the Technically Illiterate

Boat Maintenance for the Technically Illiterate

Whats the Best Way to Restore Clear Plastic Windows?

Stopping Holding-tank Odors

Giving Bugs the Big Goodbye

Galley Gadgets for the Cruising Sailor

The Rain Catcher’s Guide

Sailing Gear for Kids

What’s the Best Sunscreen?

UV Clothing: Is It Worth the Hype?

Preparing Yourself for Solo Sailing

R. Tucker Thompson Tall Ship Youth Voyage

On Watch: This 60-Year-Old Hinckley Pilot 35 is Also a Working…

On Watch: America’s Cup

On Watch: All Eyes on Europe Sail Racing

Dear Readers
- Sails, Rigging & Deck Gear
Stitching Instead of Splicing
Can using twine be the secret to splicing old ropes and lines.

Splicing is king in any discussion of line termination. By carefully tucking cover and core back into the line, or weaving strands in laid line, and using patterns that have been perfected over time, we can create virtually full-strength terminations that will last the life of the line without maintenance.
However, there are downsides. Many lines require a long bury. This bury is large and stiff, and may not fit through blocks, particularly if the line size is already large in relation to the blocks. Riggers curse this situation, where either the builder went too small with blocks or sheaves, or more likely, some previous owner upped the line size to make it easier to handle, only to increase friction instead. Splicing is also a skill that many sailors today have not developed or practiced, and it can be difficult in field conditions. Finally, older lines are stiff and notoriously difficult to splice; while some can be washed, softened, and spliced, some firmer lines are just plain impossible. The sailor who has an old, but still useful line that requires a splice-a halyard with just one frayed spot that could easily be re-used as a sheet, for example-needs an alternative.
A Knotty Solution
Knots are often the best substitute for a splice. They are fast, simple, and of known reliability. The knot has the same properties of abrasion and ultraviolet resistance as the cordage material itself and will serve as long as the line. On the other hand, knots can be bulky and snag-prone, and they weaken the line.
The extent of weakening depends on the line size, construction, and the knot used, but a knot can weaken a line by anywhere from 20 to 55 percent. Additionally, a knots efficiency is less when using slippery, high-modulus lines, even when covered with a polyester jacket.
Although Practical Sailor has had surprisingly good results tying some high-modulus lines (see PS November 2010 ) that were commonly believed not to hold knots, others refuse to hold the most common knots at high load. Many appear to hold at moderate loads, but slip apart or tear the cover under full tension.
Luckily, there are several alternatives to splices and knots that can work well in a variety of applications.
Seizings: Using smaller-diameter twine or wire to seize rope or wire-rope is as traditional as sailing. Who has not seen a tall ships standing rigging secured by dead eyes and seizings, tightly wound whipping twine seizing the bitter end to the standing end to form an eye?
For this report, we evaluated various types of seizings as a substitute for eyesplices. See the accompanying How We Tested for details of our testing,
Sewn eyes: Sewn eyes (see Other Stitching Techniques that Work Well) are less commonly used with cordage and sailing, but we see them all the time in vital webbing such as safety harnesses and on sails themselves. Sewn eyes remain a common termination in both construction and tree work industries, which are nearly as demanding as marine trades.
The sewn eyes found in commercial use are often protected with heavy heat-shrink tubing and generally last as long as the line. While these eyes are sewn by machine, we wanted to see whether hand-sewn eyes could match machine-sewn eyes in attainable strength.
Stitched and seized eyes: As a sort of belt-and-suspenders approach, we also looked at a combination of sewn (stitched) and seized eyes. Would doing both increase the strength of the eye splice?
Seizings, sewn eyes, or stitched-and-seized eyes can be used in many onboard applications. Using these for genny sheets is okay; they are easy to monitor and inspect, and they hang up less than knots. Travelers, vangs, and main sheets also are good applications. Weve seen folks use them on too-small-to-splice lazy jacks, but we don’t think thats a good application because of the UV and exposure to chafe. Like a halyard, a lazyjack is a better candidate for a knot instead of stitched eye, in our opinion.
What We Tested
Our testers recognized that different rope materials, weaves, and diameters would act differently, but evaluating more than a few was beyond the scope of this project. To limit the test field, we focused on used polyester double braid, the most common rope in recreational sailing, and the sort of line most likely to be repaired or re-purposed by a budget-minded sailor. To round out the field and to broaden our understanding of stitching used in webbing, we also included two more elastic materials-dynamic nylon rope and tubular nylon webbing.
Because we were testing used line, one question lingered: Does the reduced strength of the used line reduce splice strength? Of course it does. But we also found that if the line is in good-enough condition to reuse, proper stitching technique does not further harm the rope or reduce its strength.
For example, unless we used inappropriate materials, either the stitching broke cleanly with no damage to the rope (indicating weak stitches or thread), or the rope failed at the beginning of the stitching or at the eye. Sometimes the rope broke far from the eye-indicating the stitched eye was nearly as strong as the rope.
Because seizing involves gripping the seized parts, we wondered if the cover texture mattered. After testing a variety of brands of polyester and nylon double-braid lines, we could not conclusively say whether this made a difference. Texture seemed to be a minor factor.
Our other stretchy test products were 9/16-inch and 1-inch Climb-Spec nylon tubular webbing from Bluewater. We tested a few scraps of other webbing types, sufficient to convince us that our sewing methods delivered comparable results from other webbing materials. (We will be publishing a separate report on stitching webbing in a later issue.)
Stitching ropes requires a good sewing palm or something similar to push the needle through the rope. On particularly stiff line, we had to pull the needle through with pliers. A stitching awl could be used for this purpose, but we found a sailmakers needle to be more versatile, allowing us to change stitch styles and apply seizings without pausing to switch tools.
Most of our test line was so stiff that it could not be softened and spliced. Knotting, sewing, and seizing were the only alternatives.
Polyester Double-Braid
Before settling down to systematic test of materials, we evaluated a variety of simple, yet robust stitching methods, suitable for the DIY sailor working in the field. We did not explore machine stitching-beyond a few informative phone calls-because a special machine is required. It is certainly a proven and practical commercial method, and a wide range of industrial equipment is fabricated that way. We were content with our hand-stitched results.
We used doubled-waxed twine in all testing; doubling reduces the number of passes through the rope, minimizing damage to the rope. It better fills the needle hole, and the wax protects the thread and improves sewability. Conventional wisdom holds that the twine should be 1/12 to 1/16 of the diameter of the rope.
We found that when using modern rope materials, even larger twine-1/8 to 1/10 of the diameter of the rope (about the size of a typical cover strand)-yielded higher strength and was more resistant to UV and chafe. The additional effort required was no big deal. This size still breaks cleanly without causing rope damage. Larger twine can pull through the rope, or concentrate the stress in one area, weakening the splice.
We tested high-strength Dyneema and Kevlar twine, but we found an increased tendency for the twine to cut through at high loads. The resistance to stretching resulted in splices that were 10- to 20-percent weaker than if they were sewn with the same diameter of polyester twine. Dont use Dyneema thread with polyester or nylon webbing or rope; in the end, we decided polyester delivered the most consistent results.
Relatively even stitch tension is important. This means that you need to wrap the thread around the needle or thumb of the sewing palm after every stitch, or tug with pliers. Minor inconsistencies in stitch tension will equalize under load, and the twine will slip during the first load cycle.
We found that nylon twine was not a good choice for stitching or seizings; the twine stretches, and the stitching-even good tight seizing stitches-will loosen.
Round Stitching Technique
We tested perimeter round-stitching, basting, seizing, and some hybrid approaches. The following is a description of what we found to be the most effective technique, perimeter round-stitching. See the accompanying Other Stitching Techniques that Work Well for descriptions of the other techniques.
Perimeter round-stitching will take place over a length of rope that is the equivalent of six to eight times the diameter of the rope. For example, stitching 3/8-inch line requires about 2.5 inches of available line, not counting the tail of the line (about 3.8 inches in length) that will not be stitched. If you plan to taper the end to reduce snags, then you can pull out a length of core from the end that is twice the diameter of the core, and sew the cover to the standing part. This optional taper is only for snag reduction and does not contribute any strength.
To determine how many stitches are required, take the breaking strength of the rope and divide it by four times the twine strength. (When using this formula, remember that the stitches are doubled.) As a safety margin for our field-testing on the boat, testers took this number and added another 50 percent, so if the calculation gave us 12 stitches, we used 18.
We spaced the stitches about two cover strands apart and found that this created a splice where the line was weakened by no more than 15 percent.
Here are step-by-step instructions for round stitching:
Form a loop in the rope with the bitter end extending at least eight times the rope diameter after the loop. You can insert a thimble if you like, but this is not required.
Begin by forming a loop in the twine and hitching around one side.
Pass round stitches through both lines. The stitches should vary in location in the core, staggered from barely past the cover to near the center.
Stitch downward toward the bitter end, pass the needle through, and continue stitching up the other side to the throat of the splice.
Form a round seizing at the throat, using No. 3388 from the Ashley Book of Knots for guidance. (Round seizing is also found in most other knot books.) The seizing should be two layers-lower turns and riders-about eight to 10 turns or as long as twice the ropes diameter.
Finish the seizing with a seizing hitch (Ashley Book of Knots No. 3390) or flat knot (Ashley Book of Knots No. 3385). This throat seizing is vital as it protects the first few stitches from the peeling force generated by the eye (throat) angle.
A seizing may also be applied at the tail end, where it helps with wear.
A thimble is not needed if the radius of the attachment is about the same as the diameter of the rope. A bend in the line that is equal to one times the diameter of the rope will weaken the rope by about 50 percent, but there are two legs and only 50 percent is carried on each side. The diameter of the hardware we tested against was half the size of the diameter of the rope, and we never broke a line at the bearing surface.
Hybrid methods
We wanted to see whether combining several methods could produce something stronger or more durable. When we combined round stitching and basting, we found that the round stitches shifted less and bore the entire load, while basting shifted more and contributed nothing.
We also tried combining stitching with seizing; the seizing shifted more than the stitching, which bore the entire load. A contributing factor is that rope becomes smaller in diameter when a heavy load is applied, even when seizing is applied very tightly. In our experiments, when 30 percent of the ropes breaking strength was applied to the splice, the seizings began to loosen. When 80 percent of the ropes breaking strength was applied, they could easily be moved with the fingers.
Bottom line: If seizing is applied to provide protection against wear, it should be applied to a line that is pre-tensioned so that it will stay in place; a serving mallet helps.
Lab Observations
Our testing yielded plenty of lessons and gave us enough confidence to use stitched eyes for critical applications. Weve presented only a portion of the data here. Here are some rules of thumb and simplified discussion points that emerged.
Zippering: If sewn in the patterns we suggest, the failure of a few threads does not lead to rapid unraveling or failure. During many of our tests, we carefully cut away stitches while under full load until failure, incorporating these results when calculating the recommended stitching schedule.
UV and wear protection: We assume that all stitched constructions will be protected with some covering or coating. Although whipping twine is typically similar in size to cover strands and more durable, protecting the stitching remains part of the job. (We will be comparing chafe protection and whipping twine in a future article.)
Uneven tension does not result in a weak splice: We are not machines and our work is not particularly neat. Although we were careful to pull each round stitch taut, we were not obsessive. In fact, on some trials, we were downright careless, and the results were very nearly the same. As the load comes on, the twine shifts as needed to carry the load, and the zigzag nature of a round stitch helps, as does wax on the twine. Reasonably neat work is all that is required. The best reason to tension stitching is to pull it into the cover and reduce susceptibility to wear.
The pre-compression of rope before sewing did not help. Although we want to pre-stretch rope when using seizing, this is not true for sewn eyes. Some people suggest that pre-compressing the line with clamps or with a row of basting stitches down the middle increases strength. We tried both and found no improvement in strength. Furthermore, pre-compression can make it very difficult to pass the needle and can result in increased damage to the rope. The round stitching on both sides results in considerable compression, like a lacing, and is enough.
An additional 30 percent stitching, beyond the calculated figure, slightly increases efficiency. This is indicated in the adjacent tables.
A cover-only splice can work, but it has limits. Typically, the cover of polyester double braid carries 50 percent of the load in a splice. Wondering how secure a splice using only the cover of an old rope might be, we sewed cover-only splices on particularly ratty-looking, 5/16-inch traveler and 3/8-inch topping-lift lines. To our great surprise, all held to within 20 percent of the remaining line strength, although this was only 44 percent of its strength new.
For tight splices, like those around a small shackle or carabiner, it helps that the cover is flat. We are not suggesting cover-only eyes for anything other than reeving new lines where ordinary splices are too large.
Avoid stitching over melted ends. The burr that is created by melting can abrade the threads of the stitching.
Field Observations
Onboard testing has already given us some important insight into stitched eyes.
Wet-dry cycles and high load cycling loosened seizings that were not installed with considerable pre-tension. This problem was most obvious in splices with round stitching under the seizing.
Genoa sheets are perhaps the most difficult application, with flogging against shrouds taking a toll. A very durable covering is required. We started with shrink wrap and tore it within hours. A replacement tubular webbing cover is doing well.
Bottom line: All sewn splices are performing well after six months, some at high load factors. Whipping twine and covering durability will be addressed in a future article.
Conclusions
Both (perimeter) round-stitched and basted/whipped sewn eyes are viable alternatives to splicing when neither conventional splices nor knots will serve. The strength is predictable, and the stitching is durable, provided you add extra stitching to protect against wear, and properly sheath the stitching to protect it from ultraviolet rays and chafe. Perimeter round-stitching proved about two times stronger than basting and many times stronger than our amateur seizings.
We have a stronger preference for stitching over seizing because it is easier to do and the results are more predictable. Although seizing is time-proven on hemp rope, we don’t recommend this for amateurs, and we would never suggest this for nylon rope (because of its elasticity, nylon gets skinny under load, loosening seizings), particularly three-strand nylon, which every sailor should know how to splice.
Although all the sewing materials we tested were adequate, we prefer larger-diameter twine, within the guidelines given. As we will describe in more detail in our upcoming article, testers favored the Robline braided polyester whipping twine. It created fewer tangles and made it easier to create evenly tensioned stitches. The suggested twine, when doubled, is generally about the same size and strength as the strands used in braided cover. Staying within the cover-strand size range maximizes durability and avoids localized overload. We did not like Dyneema thread for stitching polyester or nylon; polyester twine performed much better. Dyneema twine is the right choice for sewing Dyneema products, and the abrasion resistance is superior.
Sewn splices of webbing and nylon dynamic line benefit from reinforcement with nylon webbing. Simply insert a length of matching width tubular nylon webbing between the layers, overhanging the tail by three-quarters-inch and sew down. Any high-load webbing project should be reinforced in this manner, whether hand or machine sewn.
As for long-term reliability, only time will tell. Because the suggested stitching schedules include a 50-percent margin, beyond what was determined by testing, it is probable that the splice will remain greater than line strength for five to 10 years-the expected life of the line. The twine will weaken and fray over this time, so even our sheathed unions need regular inspection. Well be long-term testing to determine durability. Based on what we found, the splice should remain as strong as the line.
Our testers experience so far confirms that long-term durability is attainable, but we are going to spend the next four years systematically testing both coatings and physical coverings, in the lab and on the water. There are some exciting line coating products on the market and very little data on how these products perform in the real world. We have started abrasion testing in the lab using an abrasion machine, and the durability of these sewn eyes has surprised us.

After dozens of tests, we came up with these minimums for twine strength, length of round-stitching, stitch count, and the spacing required to match the indicated line-strength for polyester double braid. The schedule includes a 100-percent safety factor for wear; half of the stitches would hold the load. Marlow and Robline offer whipping twines of various sizes and strengths.
- Break and Break Again

- Other Stitching Techniques that Work Well
RELATED ARTICLES MORE FROM AUTHOR

Working with High-Tech Ropes
I’d love to see a picture or detailed description that shows “perimeter round-stitching”. It’s not really described in the article and a web search reveals not much.
DIY Sewn Splice by Drew Frye https://www.youtube.com/watch?v=y7DgVSvhsjM
This video was very helpful but is no longer available after the closing of the GoodOldBoat site. It would be great to add it to the new Practical Sailor Youtube. Thank you.
I second the motion! What exactly do you mean by “round stitch”? Some close up photos would work wonders, as I can’t find anything with an on-line search except for this article. Otherwise DuckDuckGo comes up with knitting topics.
A picture is worth a thousand words, or in this case a power point would be a great help.
Completely agree with these guys. Meanwhile I plan on buying the ABOK to help explain the Round stitch.
Pictures, Pictures, please.
A picture that actually showed both sides of the stitching in detail would really help. It is unclear what is meant by “Stitch downward toward the bitter end, pass the needle through, and continue stitching up the other side to the throat of the splice.”. And what is unclear is whether or not the stitches ever cross each other. I have made some sample dog bones but it is very awkward trying to stitch down and then back up without crossing the stitches. Please add some detail.
All right, I think I figured it out. I knew my previous post would cause my brain to figure this out–I swear as soon as I’m ready to ask for help it means I’m usually on the verge of figuring it out. Maybe this would be obvious to someone in the sailing world, I’m sewing for arborist purposes, but based on the pictures, and my complete lack of familiarity with stitching anything, I was sewing on the wrong plane. Basically if you make an eye and lay the rope flat on a table I was stitching down one side, drawing the twine across both, and then stitching up the other. I could be wrong now, but I think it is supposed to be stitching across/through both lines, drawing the twine across, and then pushing the needle through both lines. Sewing as I just described at least allowed me to actually sew down toward the bitter end on one side, pass the needle through, and then sew UP the other side towards the throat of the eye. Assuming I’m correct I would heartily suggest a tiny bit of clarification be added to the article. This is great information and the strength of my amateur sewn eyes is incredible. I’ve only tested them by using a 3 ton come-a-long to apply tension but the stitches held and did not visibly distort–very impressed and I strongly encourage anyone on the fence to just jump in and start sewing. One customization I made was to blunt my needle to try and damage fewer strands in the rope.
LEAVE A REPLY Cancel reply
Log in to leave a comment
Latest Videos

Cabo Rico 34 Boat Review

Super Shallow Draft Sailboat: The Leeboard Sharpie

Hans Christian 41T – Boat Review

Seven dead after superyacht sinks off Sicily. Was the crew at...
Latest sailboat review.

- Privacy Policy
- Do Not Sell My Personal Information
- Online Account Activation
- Privacy Manager
Omsk Oblast
- Edit source
The flag of Omsk Oblast is a rectangular cloth of three vertical bands of equal size: the right and left red and white medium. In the centre of the white band, there is a blue vertical wavy azure pole which is 1/3 of its width.
The ratio of the flag's width to its length is 2:3.
The interpretation of symbols [ ]
The main background of the flag of Omsk Oblast is red. It symbolizes bravery, courage, fearlessness. It is the colour of life, charity, and love.
The white symbolizes nobility, purity, justice, generosity, and indicates the climatic features of Siberia.
The wavy azure (blue) post symbolizes the Irtysh River, the main waterway of the oblast. Allegorically, the blue reflects beauty, majesty, and gentleness.
Flag Redesigns [ ]
| • T |
|---|
- 2 Gallery of flags of dependent territories
- 3 Flags of country subdivisions
IMAGES
VIDEO
COMMENTS
Cut them all off flush with the cover. Then make Marks 1, 2 and 3 as per the Jamestown instructions. Put the folded end of your homemade fid into the center of the core at Mark 3 and out at Mark 2. Thread the tapered end of the cover through the "eye" of the fid. Pull the fid back out through Mark 3 until Mark A on the cover (the mark just ...
8. Starting about 4 inches from the end, use a small fid to pull out about 8-10 random strands from the cover before trimming them off with scissors. This creates a neat splice with a taper. 9. Pull on the end of the exposed core as you massage the junction of the core to cover the joint. 10.
http://www.premiumropes.comNEW VIDEO MADE: https://youtu.be/1GvXKiH1kLwHow to make an eye splice in a double braid polyester rope for e.g. halyards. SPLICING...
Samson recommends splicing as the preferred rope termination method. Knots can significantly decrease a rope's strength while, in most cases, splicing maintains 100% of the specified rope strength. This makes splicing a more reliable and durable option for critical applications. Splice terminations are used in all our ropes to determine new and ...
BoatUS Magazine associate editor Mark Corke shows you how to splice double braid line. To add a loop or eye to double braid line on your boat, you need a len...
English Braids is looking to deliver the best possible support for all yachtsmen looking to maintain their own products. This video clearly demonstrates the ...
The essential tools for completing a double braid splice are: a length of new double braid line, a set of Samson Aluminum Tubular Splicing Fids (or similar), an awl or marlinspike, a sharp knife, cutting board, sharp scissors, masking or Marlow tape and a black Sharpie (silver if marking black line). Note: Do not splice used line; even if it ...
Double Braid Splice. Doublebraid heat set rope combines industry-leading strength and stretch resistance with a flexible, user-friendly feel. Ideal for yacht sheets and splicing, its heat-treated design minimises stretch for both high-load and everyday use. This all-around rope offers exceptional performance.
loosen and lubricate the fibers and make the splice easier to perform. Through use and exposure to the elements, the fibers in a used rope have probably lost some of their original strength. In addition, some shrinkage has probably occurred making this splice the most difficult to perform. General Splicing 3 Fid Lengths 3 Single Braid 4
Double braid lines with a polyester core are commonly used for a variety of low stretch running rigging roles such as halyards, reefing and control lines. This splice is a real money saver as there are potentially a lot of these splices within a yacht's running rigging.
Other tips and tricks for splicing rope for milking the cover in this video. Splicing modern braided ropes of super fibres is quite fun and easy to learn. Premiumropes has uploaded various splicing tutorials, such as eye-splices, soft shackles, taper sheets or make a continuous furler line. Make sure you have enough space to work and an ...
A few things that beginners might not know about splicing double-braid:u000b1. Every size line requires a different fid. If someone tries to sell you a one-size-fits-all fid in a splicing kit, run the other way.u000b2. Stretched line is ten times harder to splice than unused line. Avoid the temptation to tie a bowline in a new line and use it a ...
General Splicing Instructions. Adjustable Slings - Backsplice - 10015105. Industrial Double Braid Eye Splice - 10017200. Single Braid Eye Splice - 10015101. High Performance Single Braid Splice - 10015112. End-for-End Single Braid Splice - 10015102. End-for-End Single Braid Splice - 10015102. Yale Whiplock - 10017500.
Note: This splice is not suitable for core-dependent double braid constructions (Double Braid Class II). For Double Braid Class I products over 2" (48mm) in diameter, please see the special instructions included below. Tape end to be spliced with 1 thin layer of tape. Then measure 1 tubular fid length or 2 wire fid lengths from the end of the
Step #5: Cut and remove the marked strand pairs on the cover tail, then retape the end. Attach the fid to the cover tail and tape as needed. Insert the fid into the hollow core at Mark "2" and out at Mark "3". (When exiting or entering the braid with the fid always go between strands). (Fig. 5) Remove the fid and tape.
SUBSCRIBE DIRECTLY with us so you never miss an episode: https://www.riggingdoctor.com/subscribeSplicing double braid line might seem complicated and overw...
My tool in this photo is indicating where the joint is going. (9) At the joint selected, get behind the core again. (10) Pull a length of core out of the length of the rope. It comes out easily. Note the 'fat' look of the cover on the long part of the rope as compared to the loop. Keep the loop snug.
Mega Braid's unique 12-strand, single braid construction offers a combination of good looks, superb handling, excellent strength and controlled elongation. It's flexible and is easy to coil or flake. Comes in 600' spools or custom spliced. Applications of our Mega Braid: Anchor and dock lines for boats over 40'.
A cover-only splice can work, but it has limits. Typically, the cover of polyester double braid carries 50 percent of the load in a splice. Wondering how secure a splice using only the cover of an old rope might be, we sewed cover-only splices on particularly ratty-looking, 5/16-inch traveler and 3/8-inch topping-lift lines.
Novovarshavsky District ( Russian: Нововарша́вский райо́н) is an administrative [1] and municipal [5] district ( raion ), one of the thirty-two in Omsk Oblast, Russia. It is located in the southeast of the oblast. The area of the district is 2,200 square kilometers (850 sq mi). [citation needed] Its administrative center is ...
Omsk Oblast (Russian: О́мская о́бласть, romanized: Omskaya oblast') is a federal subject of Russia (an oblast), located in southwestern Siberia.The oblast has an area of 139,700 square kilometers (53,900 sq mi). Its population is 1,977,665 (2010 Census) [9] with the majority, 1.12 million, living in Omsk, the administrative center.One of the Omsk streets
Another one of the several street monuments of Omsk city. In general street monuments like in Omsk are interesting idea. 5. Monument The Scales of Existence. 20. Points of Interest & Landmarks • Monuments & Statues. 6. Monument to the Children of Besieged Leningrad. 21.
The Flag of Omsk Oblast Is Official Since June 17, 2003. The flag of Omsk Oblast is a rectangular cloth of three vertical bands of equal size: the right and left red and white medium. In the centre of the white band, there is a blue vertical wavy azure pole which is 1/3 of its width. The ratio of the flag's width to its length is 2:3. The main background of the flag of Omsk Oblast is red. It ...