ACTIVE STORM TRACKER Hurricane and Tropical Storm Information Learn more
Service Locator
- Angler Endorsement
- Boat Towing Coverage
- Mechanical Breakdown
- Insurance Requirements in Mexico
- Agreed Hull Value
- Actual Cash Value
- Liability Only
- Insurance Payment Options
- Claims Information
- Towing Service Agreement
- Membership Plans
- Boat Show Tickets
- BoatUS Boats For Sale
- Membership Payment Options
- Consumer Affairs
- Boat Documentation Requirements
- Installation Instructions
- Shipping & Handling Information
- Contact Boat Lettering
- End User Agreement
- Frequently Asked Questions
- Vessel Documentation
- BoatUS Foundation
- Government Affairs
- Powercruisers
- Buying & Selling Advice
- Maintenance
- Tow Vehicles
- Make & Create
- Makeovers & Refitting
- Accessories
- Electronics
- Skills, Tips, Tools
- Spring Preparation
- Winterization
- Boaters’ Rights
- Environment & Clean Water
- Boat Safety
- Navigational Hazards
- Personal Safety
- Batteries & Onboard Power
- Motors, Engines, Propulsion
- Books & Movies
- Cockpit Confessions
- Communication & Etiquette
- Contests & Sweepstakes
- Colleges & Tech Schools
- Food, Drink, Entertainment
- New To Boating
- Travel & Destinations
- Watersports
- Anchors & Anchoring
- Boat Handling
- ← Install & Repair

Boat Headliner Repairs
Advertisement
Age and abuse can discolor or rip liners in your boat. But Tom's a fan of figuring out innovative repairs. Here's a trick to cover up any eyesores.

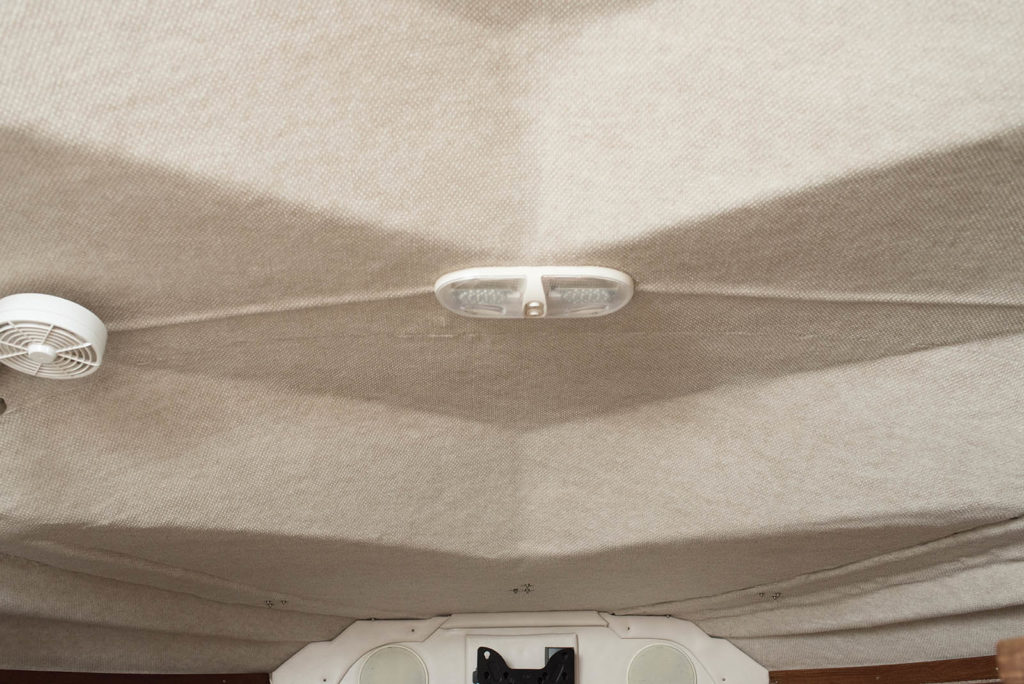
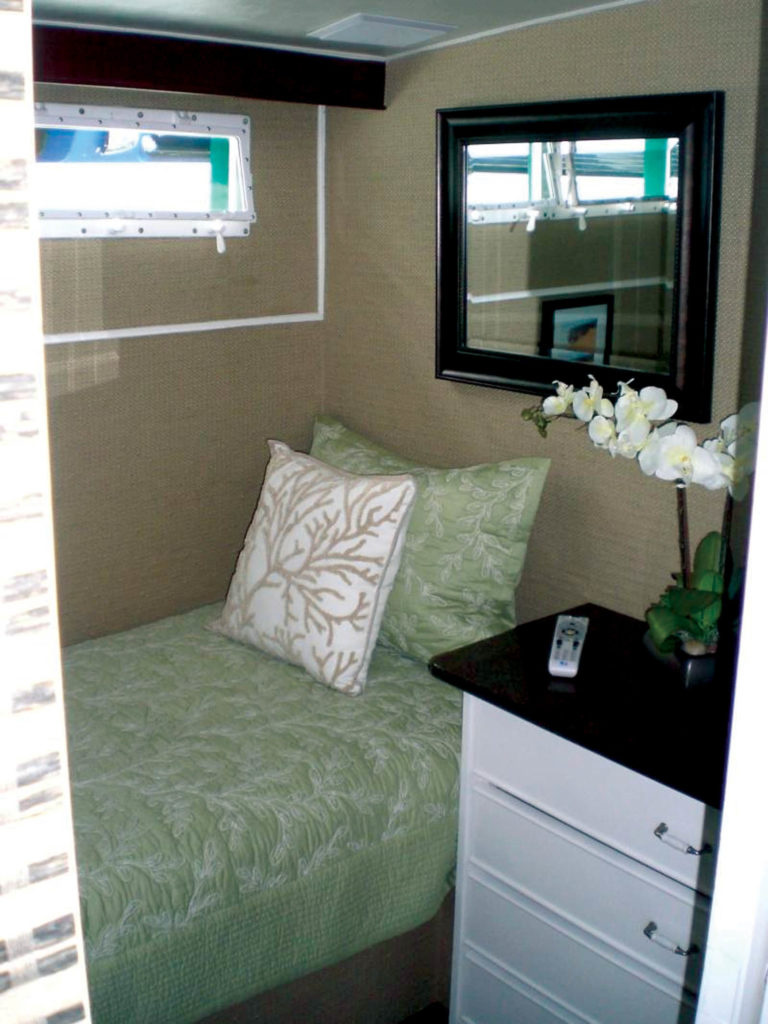
The completed project. Who would ever know what was there?
Liners inside the cabins of boats come in many materials, but they all have one thing in common: Eventually they tear or become damaged. In older boats, even finding the same material may be impossible, and if you do, the job of replacing the entire liner or even a section may be very expensive. Patchwork may be the cheaper and easier way out, but it will probably look like patchwork — and nobody wants that. But if you incorporate another project into the lining repair, you can sometimes disguise the fact that it's patchwork AND get an additional bonus.
For example, on our boat, we had a liner that had been ripped before we owned the boat. Our solution was to cover the problem area with what is essentially patchwork. But you'd never know it because the patchwork has been transformed into a mounting for a new fan.
I purchased a sheet of StarBoard (1/4" x 6" x 12") from West Marine for around $13 (see "Technical Support," below). This material comes in several thicknesses and colors, including white and black. It will take screws (wood or better) and bear weight, depending on thickness and use. It's high-density polyethylene designed to resist saltwater, chemicals, and sunlight. It won't rot or delaminate, and is easily cut, routed, shaped, and drilled, using standard tools. It has a durable surface, which easily cleans.
Technical Support
Degree of difficulty:.
Easy to moderate
- Multi-meter
- Wire-crimping tool
- Electric drill and bits
- Butt connectors
- Screwdrivers
- Headlamp and shop lights (optional)
Materials & Cost:
- StarBoard $13
- Butt connectors and six stainless wood screws $5
Project Cost:
$98 (based on West Marine pricing)
Approximate Yard Time/Cost:
This is a straightforward job and shouldn't take a pro more than an hour or so. The national average cost for a marine electronics installer runs about $80 an hour but many have minimums, so you can plan on saving around $100 by doing the work yourself.

The problem: ripped dirty headliner.
I purchased a sheet just large enough to cover the damage. All I had to do was screw it onto the strip of plywood in the overhead, to which the liner material was attached. I predrilled and used pan head screws. I could have countersunk the screw holes and used oval-head screws, but preferred to not use this slightly weakening process. The material is durable enough that washers weren't needed. When I attached the material, the tear disappeared. But the area, of course, no longer matched the surrounding areas.
We needed a fan in that area, anyway, so I purchased one for around $80 from West Marine. Prior to screwing on the StarBoard, and using the base of the fan as a template, I drilled holes appropriately sized to securely thread the mounting screws that came with the fan and drilled another hole through the StarBoard, behind the fan mount, to take the wire. I taped the fan wire ends to avoid separating the strands and carefully pulled the wires through that hole and pushed them underneath the lining, making sure they were not lying in an area where they would be compressed or where abrasion could occur.

Predrilling StarBoard.

Testing existing wire for polarity and current.

Uncrimping old butt-end connector with careful pressure from dull wire cutter.

Streamlight 3AA Haz-Lo headlamp lights tight area.

Work light floods dark area. Use quality crimping tools.
With a Volt-Ohm Meter, I tested voltage for the old 12-V DC wiring leading to the area behind the adjacent bulkhead to be sure polarity hadn't been reversed by someone in the ancient past, and then again to be sure power was indeed gone after I flipped the breaker. This wire would've been too short if I cut off the old connectors, so I removed them by carefully compressing them at the point of the crimp with a crimping tool. Next I connected the new fan wires, using tinned butt-end connectors, to that existing wire behind the bulkhead. This work was close to and inside the bulkhead, so I used a Streamlight Knucklehead worklight and a 3AA HAZ-LO headlamp for good lighting. The existing wire was of more than adequate gauge to handle the tiny load of the fan and was already protected by an appropriately sized circuit breaker. The new fan's wires were long enough to allow this work before mounting the fan — a feature I always insist upon when buying something to be installed.
I finished the job by screwing the StarBoard, with fan base attached, to the overhead, attaching the fan and snugly and securing the wire. Now the rip is covered, a smart-looking fan is mounted in its place, and the mounting looks nothing like a jury-rigged repair but a nicely thought-out and properly executed fan mount. Only you and I know it was never originally planned that way!
Plastic Or Wood?
There are several versatile synthetic products now on the market that can be used in place of wood for many boat projects. They're easy to work with, using simple woodworking tools, and easy to hand-sand. Examples include StarBoard by King Plastic , and CMG and KOMATEX by Kommerling . StarBoard and CMG are more robust for mounting purposes. CMG is claimed to also accept fiberglass. Komatex, depending on thickness, can be very flexible and easier to fit, but is less appropriate for structural or mounting purposes.
Related Articles
The truth about ceramic coatings for boats.
Our editor investigates the marketing claims of consumer-grade ceramic coatings.
Fine-Tune Your Side Scan Fishfinder
Take your side-scanning fishfinder off auto mode, and you’ll be spotting your prey from afar in no time
DIY Boat Foam Decking
Closed-cell foam flooring helps make boating more comfortable. Here’s how to install it on your vessel
Click to explore related articles
Technical Editor, BoatUS Magazine
One of the top technical experts in the marine industry, Tom Neale, BoatUS Magazine Technical Editor, has won nine first-place awards from Boating Writers International, and is author of the magazine’s popular "Ask The Experts" column. His depth of technical knowledge comes from living aboard various boats with his family for more than 30 years, cruising far and wide, and essentially learning how to install, fix, and rebuild every system onboard himself. A lawyer by training, for most of his career Tom has been an editor and columnist at national magazines such as Cruising World, PassageMaker, and Soundings. He wrote the acclaimed memoir All In The Same Boat (McGraw Hill), as well as Chesapeake Bay Cruising Guide, Vol. 1. These days, Tom and his wife Mel enjoy cruising their 2006 Camano 41 Chez Nous with their grandchildren.
BoatUS Magazine Is A Benefit Of BoatUS Membership
Membership Benefits Include:
Subscription to the print version of BoatUS Magazine
4% back on purchases from West Marine stores or online at WestMarine.com
Discounts on fuel, transient slips, repairs and more at over 1,200 businesses
Deals on cruises, charters, car rentals, hotel stays and more…
All for only $25/year!
We use cookies to enhance your visit to our website and to improve your experience. By continuing to use our website, you’re agreeing to our cookie policy.
Practical Boat Owner
- Digital edition

Replacing headlinings: How to cure the droop
- Jake Kavanagh
- February 19, 2020
Are you coming unstuck? If your headlining is starting to part company with the deckhead, it’s time for a makeover. Jake Kavanagh follows professional upholsterer Roger Nantais as he refurbishes a Westerly Seahawk

The biggest enemy of foam-backed vinyl is water. If this leaks in through deck fittings, it can gradually rot the foam; the glue fails to grip on the crumbling mess, and eventually the vinyl will start to fall down. Many owners make valiant attempts to fix the vinyl back up, but this can often create more problems than it solves.
This article deals with linings stuck to hull sides. You can also stick them to removable plywood panels, which we followed in this article: Making Headlining Panels.
On Jane Scott and Chris Smith’s 18-year-old Westerly Seahawk 2+2, a combination of leaking deck fittings and high Mediterranean temperatures had gradually perished the foam backing, and the boat was looking decidedly scruffy inside. They decided to call in professional upholsterer Roger Nantais, who refurbished the linings from stem to stern. PBO followed his progress to learn some useful trade secrets.
Preparation ‘You really need power,’ Roger explained. ‘It’s possible to use hand tools, but the task is made much easier if you can use a hot-air gun, a vacuum cleaner and a drill with a wire brush attachment.’
As a result, the Westerly was moved from her mooring in Poole Harbour to Davis’s boatyard in nearby Hamworthy, where Roger was able to hook up to shore power.
Depending on the state of decay, it may not be necessary to renew all the headlinings at once, but on older boats you could have trouble matching the colours. This Westerly had fairly standard white linings thoughout, complemented by plywood panels on the deckhead in the saloon. In some areas, the original linings were trapped under substantial deck fittings, such as the chain plate bases, which Roger decided to work around.
With the headlinings down, many owners use the opportunity to check hidden wiring, and get to the base of any leaking deck-fittings. These need to be re-sealed before being covered in foam again. We started with the forward cabin first, which was the most badly affected.
Stripping off The forecabin on this boat, as on many similar designs, has a complex headlining made of several panels of vinyl, all sewn together into a contoured piece. It may seem daunting to replace, but the procedure is quite straightforward.

1: All the wooden trims and beadings are unscrewed. These won’t be used again, because the edges they normally hide will be made to look neater with stitching

2: The vinyl panels are peeled back carefully, while trying to keep them in one piece to use as a pattern

3: Any stubborn patches can be loosened with a hot-air gun

4: Before removing a panel, clearly mark its position and orientation – in this case, port lower, with the arrow pointing towards the bow

The hatch trim is unscrewed, and the side facing the bow marked with pencil so the screw holes can be relocated

6: a blade is run around the edges of the window to free the vinyl. The window surrounds will be removed later

7: With the amount of degradation to the foam, the headlining piece comes down easily – and usefully intact

8: The upholsterer will use the old headlining as a template for sewing the panels that will make the new one

9: The window backs are held in place by flush-fitting bolts, which need to be removed from both the outside…

10: …and the inside. This will require two people in the more inaccessible areas. Those shown here present no problem for the solo worker

11: If the window frame is a bit stubborn, it can be prized off with a screwdriver, but be careful not to kink the metal.

12: With the inner frame removed, the vinyl beneath it can be stripped away. Remember to mark the frame in pencil to aid reassembly

13: With all the vinyl panels marked up and removed, now comes the messy bit. Use the wire brush and hot-air gun to clean off all the old glue and foam. Previous attempts at re-sticking may have resulted in hard patches of glue, which have absorbed some of the crumbling foam. The smoother you can make the inside of the hull, the neater the finish will be. Sweep up with the vacuum cleaner, and make sure you wear a dust mask.
- 1. Introduction
- 2. Relining the cabin
- 3. Tools of the trade
Installing a new headliner on your boat
Replacing a boat's headliner is a crucial step in maintaining a healthy living environment and improving the appearance and functionality of your cabin.
Installing a New Headliner on Your Boat
Welcome to another informative article in our Boat Modifications and Upgrades section. Today, we will be discussing a crucial aspect of interior design and organization: installing a new headliner on your boat. A headliner is the material that covers the interior ceiling of your boat’s cabin, providing insulation, soundproofing, and a clean, finished appearance. Over time, headliners can become damaged, stained, or simply outdated, making it necessary to replace them. In this comprehensive guide, we will walk you through the process of installing a new headliner on your boat, ensuring that your living space remains comfortable, functional, and aesthetically pleasing.
Table of Contents
Why replace your headliner, choosing the right material, tools and materials needed, preparing the workspace, removing the old headliner, measuring and cutting the new headliner, installing the new headliner, finishing touches, maintenance and care.
There are several reasons why you might want to replace your boat’s headliner:
- Aesthetics : An old, stained, or sagging headliner can detract from the overall appearance of your boat’s interior. Replacing it with a fresh, new material can instantly update and improve the look of your cabin.
- Insulation : A well-insulated headliner can help regulate the temperature inside your boat, keeping it cooler in the summer and warmer in the winter. If your current headliner is not providing adequate insulation, it may be time for an upgrade.
- Soundproofing : A quality headliner can help dampen noise from outside the cabin, as well as reduce vibrations and echoes within the space. If your current headliner is not providing sufficient soundproofing, consider replacing it with a more effective material.
- Mold and Mildew : Over time, moisture can cause mold and mildew to form on your headliner, posing a health risk and creating unpleasant odors. Replacing a moldy headliner is essential for maintaining a healthy living environment on your boat.
When selecting a new headliner material, consider the following factors:
- Durability : Choose a material that is resistant to wear and tear, as well as moisture and UV damage. Vinyl and marine-grade fabrics are popular choices for their durability and ease of maintenance.
- Insulation : Look for materials with insulating properties to help regulate the temperature inside your boat. Foam-backed vinyl and carpet-like materials can provide additional insulation and soundproofing.
- Ease of Installation : Some materials are easier to work with than others. Flexible materials like vinyl and fabric are generally easier to install than rigid materials like wood or fiberglass.
- Appearance : Consider the overall look and feel you want to achieve in your boat’s interior. There are countless colors, patterns, and textures available, so choose a material that complements your existing décor and personal style.
Before you begin the installation process, gather the following tools and materials:
- New headliner material
- Measuring tape
- Scissors or utility knife
- Straight edge or T-square
- Adhesive (appropriate for your chosen material)
- Paint roller or brush (for applying adhesive)
- Staple gun and staples (optional, for certain materials)
- Trim or molding (for finishing edges)
- Screwdriver (for removing and reinstalling hardware)
- Protective gloves and eyewear
Before you begin removing the old headliner, take the time to properly prepare your workspace:
- Clear the Area : Remove any furniture, cushions, or other items from the cabin to create a clean, open workspace.
- Protect Surfaces : Cover the floor and any nearby surfaces with drop cloths or plastic sheeting to protect them from adhesive and debris.
- Ventilation : Ensure that your workspace is well-ventilated, as some adhesives can produce strong fumes. Open windows and doors, and consider using a fan to improve air circulation.
- Safety : Wear protective gloves and eyewear to protect yourself from potential hazards during the installation process.
Before you can install your new headliner, you’ll need to remove the old one. Follow these steps to safely and effectively remove your existing headliner:
- Remove Hardware : Carefully remove any hardware, such as lights, vents, or handrails, that may be attached to the headliner. Be sure to keep track of any screws or other small parts so you can easily reinstall them later.
- Detach the Headliner : Depending on the type of headliner you have, it may be attached with adhesive, staples, or both. Carefully peel back the material, using a scraper or putty knife if necessary to help loosen the adhesive. If your headliner is stapled, use a staple remover or flathead screwdriver to carefully pry out the staples.
- Clean the Surface : Once the headliner has been removed, thoroughly clean the ceiling surface to remove any remaining adhesive, staples, or debris. This will ensure a smooth, even surface for installing your new headliner.
With the old headliner removed and the surface cleaned, you’re ready to measure and cut your new headliner material. Follow these steps for accurate measurements and precise cuts:
- Measure the Ceiling : Using a measuring tape, measure the length and width of your boat’s ceiling, adding a few extra inches to each dimension to allow for trimming and adjustments during installation.
- Mark and Cut the Material : Lay your new headliner material out on a clean, flat surface. Using a straight edge or T-square, mark the dimensions you measured onto the material. Carefully cut along the marked lines with scissors or a utility knife, ensuring that your cuts are straight and even.
With your new headliner material cut to size, you’re ready to begin the installation process. Follow these steps for a successful installation:
- Apply Adhesive : Following the manufacturer’s instructions, apply adhesive to the back of your headliner material using a paint roller or brush. Be sure to apply an even, consistent layer of adhesive, taking care not to leave any gaps or clumps.
- Position the Material : Carefully lift the headliner material and position it on the ceiling, starting at one end and working your way across. Press the material firmly onto the surface, smoothing out any wrinkles or bubbles as you go.
- Trim Excess : Once the headliner is fully adhered to the ceiling, use a utility knife to carefully trim away any excess material along the edges.
- Secure with Staples (Optional) : If your headliner material requires additional support, use a staple gun to secure the edges of the material to the ceiling. Be sure to space the staples evenly and keep them as close to the edge as possible to ensure a clean, professional appearance.
With your new headliner installed, it’s time to add the finishing touches:
- Install Trim or Molding : To create a clean, finished edge along the perimeter of your headliner, install trim or molding. This can be attached with adhesive, nails, or screws, depending on the type of trim and your boat’s construction.
- Reinstall Hardware : Carefully reinstall any hardware that was removed during the headliner removal process, such as lights, vents, or handrails.
- Clean Up : Remove any protective coverings from your workspace and clean up any debris or adhesive residue.
To keep your new headliner looking and performing its best, follow these maintenance and care tips:
- Clean Regularly : Gently clean your headliner with a damp cloth and mild soap, taking care not to saturate the material or damage the adhesive. Be sure to address any spills or stains promptly to prevent permanent damage.
- Inspect for Damage : Periodically inspect your headliner for signs of wear, damage, or mold and mildew. Address any issues promptly to prevent further damage and maintain a healthy living environment on your boat.
- Avoid Overloading : Be mindful of the weight and distribution of items stored in your boat’s cabin, as excessive weight or uneven distribution can cause stress on the headliner and lead to sagging or damage.
Installing a new headliner on your boat is a rewarding project that can greatly improve the comfort, functionality, and appearance of your living space. By following this comprehensive guide, you can confidently tackle this project and enjoy the benefits of a fresh, updated headliner. Remember to choose a durable, high-quality material, and take the time to properly prepare your workspace and follow each step of the installation process. With a little patience and attention to detail, you’ll be well on your way to a beautiful, functional headliner that will serve you well for years to come.

- Forum Listing
- Marketplace
- Advanced Search
- About The Boat
- Gear & Maintenance
- SailNet is a forum community dedicated to Sailing enthusiasts. Come join the discussion about sailing, modifications, classifieds, troubleshooting, repairs, reviews, maintenance, and more!
DIY head and hull liner replacement

- Add to quote
I recently bought a 21' 1981 Edel sailboat and the head and hull liner need replacing. I've spent as much as I want to spend on repairs and would like to replace these myself - but this is my first boat and I have zero experience with any kind of boat work. If anybody has suggestions for things I could read, or tips or dire warnings about why I should just suck it up and pay a pro, I'd love to hear your thoughts.
Some use automotive headliner, some use vinyl Trim covers hatchet jobs Shouldnt be hard or expensive Surface prep after tearout is key

Welcome to boat ownership! Your life will never be the same. Smarter people than me will comment, I'm sure; but regarding the head replacement, if it's a marine head such as a Groco or Jabsco, you can likely rebuild your existing, or for not much more money purchase a new unit. That's what I did when I originally bought my 3rd boat, a Catalina 25. The rebuild kit was only about $30 less than a brand new unit (if I remember correctly), and it only took an hour to remove the old head and install the new head. Mine was a Groco, and the hole pattern was identical. Best of luck with the new boat and the projects!

Not familiar with that boat, Carovina....would be helpful to know if the existing headliner was glued in place or made from panels held in place with batten strips or something like that. Same for the hull liner. Pics would help! In either case if you have even modest craft skills you can probably DIY.....
After you remove the old head liner, think about not replacing the headliner but and cleaning sealing with penetrating epoxy and painting.

Carovina said: I recently bought a 21' 1981 Edel sailboat and the head and hull liner need replacing. Click to expand...
Thanks everybody! I'm checking out the videos and LOL yes, I do mean headLINER, not head. Both the head and the hull liner need to be replaced, although the hull liner is a lot worse than the headliner. That's what I get for leaving out the hyphens. No head in this little boat other than a portable one. I'll take some pictures the next time I'm at the boat. The existing liner is the carpet type and was glued on - a lot of it has already pulled off. Surface prep after I tear it off is exactly why I was hesitating for a DIY; the under-surface is very coarse and uneven from the glue - can I just sand that off with a little hand sander on a low power or is there a boat-specific process? It seems like it's a bit like hanging wallpaper, maybe? She's a fantastic little boat; I'm a very novice sailor but we got in a couple of nice sails before the weather chilled and we're looking forward to many hours on the Chesapeake Bay with her this summer, so gotta get this project done soon!
Be very careful to protect yourself from the dust from the fiberglass if you sand. It’s easy enough to do - wear a cartridge style respirator, use a scraper before you sand to get most of the big stuff, then use a sander with shop vac attached. EZ PZ. After that the hard part will be conforming the new carpet to the curves of the hull and cabin top and getting it to stay in place while whatever adhesive you are using cures a bit. That being said - carpet isn’t the best material for inside a boat because it’s a magnet for mold and mildew. If you can sand it smooth and paint it, or cover it with removable panels that might be better in the long term.
Very DIY doable, if one is disciplined. Prep is critical. I think carpet is often used, because it hides a lot of subsurface imperfections, but it's not a great idea, as mentioned above. Often holds moisture. It just may mean you'll need to fair out the bare hull a bit, before applying something else. Concave or convex surfaces beg for a flexible covering, like vinyl or the OEM carpet. However, if you have flatter surfaces, vinyl covering sections of 1/8" plywood attached with heavy duty dual lock is removable for access or repair and covers a lot of subsurface sins. They do not have to custom fit entire walls or overheads, you can do them in sections.
Minnewaska said: However, if you have flatter surfaces, vinyl covering sections of 1/8" plywood attached with heavy duty dual lock is removable for access or repair and covers a lot of subsurface sins. They do not have to custom fit entire walls or overheads, you can do them in sections. Click to expand...
Luan and frp should be easy to work with. Big box stores..4x8 sheets
Check youtube for "boat headliner replacement". Few different ideas.
You might like something like poster board to pattern the templates
Cost. time and 21ft boat. Don't overdo cost or time. Review you options with this in regard. After the carpet is removed and the surface cleaned as well as possible, seal with a penetrating epoxy even if a rough surface, then paint with a one part topside paint if reasonably smooth or a truck bed liner or garage floor paint if not so smooth.
Personally, I'm not a big fan of painting down below. Once painted, always painted. Surface prep would need to be all that much better too. I'm assuming it's fiberglass under the carpet. If so, I'm not thinking penetrating epoxy is the way to go.
I am removing a vinyl glued on fore peak hull liner from the late 60's now (about half off) and will be removing the glue next. Any suggestions on less unpleasant solvents for removing what appears to be contact adhesive. I have previously used acetone and do not wish to do that again.

@Carovina After looking at some pics of the design, it doesn't look like a huge job, but new projects like this often seem overwhelming at the start. This is definitely something you can do. Lots of good suggestions here and YouTube is your friend. It will be a dirty job. Someone already mentioned getting a respirator for the sanding part, well worth the investment. In my opinion, dust masks are worse than useless. When sanding below I also set up a box fan to pull dust from the cabin. -Paint or gelcoat if you are not too worried about making it look great. It will be really labor intensive to prep those surfaces to look good under paint. Easy to keep clean, and you could install panels over it later if you hate it. -Carpet... Pretty easy to cut and glue in place, minimal prep. Very difficult to keep clean, it will just get nasty over time. -Panels. Minimal prep work, easy to keep clean and can look pretty nice. I'd attach them using a method that allows you to remove them from time to time, mold and critters like to live behind them. If you use plywood, make sure it is well sealed. -Vinyl, there a lot of options out there. The newer tongue and groove flooring products that are very easy to work with and may be rigid enough that you wouldn't need to glue them to the sides. Good luck! Post pics of the finished product!
PhilCarlson said: Vinyl, there a lot of options out there. The newer tongue and groove flooring products that are very easy to work with and may be rigid enough that you wouldn't need to glue them to the sides. Click to expand...
- ?
- 176.3K members
Top Contributors this Month

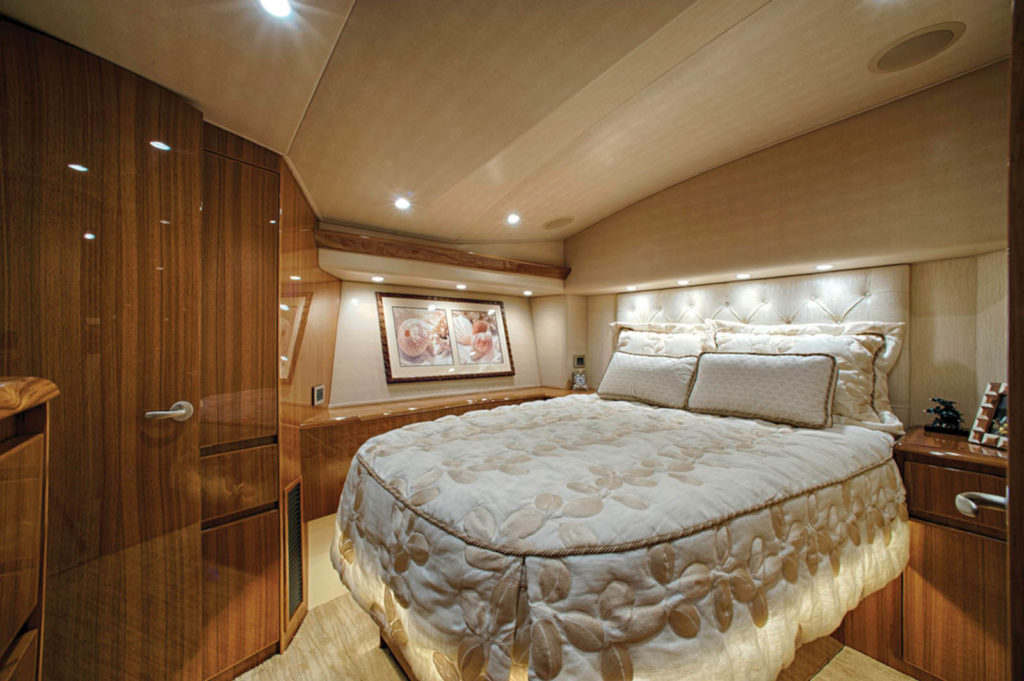
Revitalize Your Sailboat V-Berth: How We Replaced Our Headliner
In the video below we explore the process of replacing the worn-out and inefficient vinyl headliner in our sailboat’s v-berth. The existing headliner lacked insulation, leaving the V-berth vulnerable to temperature extremes. By removing the old one, adding insulation using closed-cell neoprene sheets, and installing a high-quality EverSoft™ Foam Backed Headliner , we achieved a visually appealing and comfortable v-berth.
Step 1: Removing the Old Headliner
To begin the transformation, the first task is to remove the existing vinyl headliner. Ours was glued to the fiberglass. Using tools like a heat gun, putty knives, and an electric multi-tool, we carefully scraped away the old one. This step requires patience and precision to ensure a smooth and clean canvas for the new installation.
Step 2: Adding Insulation
To enhance insulation and improve comfort, we incorporated 3/8 inch closed-cell neoprene sheets into the project. By creating a paper pattern to match the shape of your v-berth ceiling, we cut out the neoprene sheets accordingly. These sheets provide a barrier against heat and cold, ensuring a more comfortable environment in the v-berth.
Step 3: Gluing Neoprene Sheets and Installing EverSoft™ Foam Backed Headliner
We used contact cement to carefully adhere the neoprene sheets to the ceiling of the v-berth. Take your time to ensure proper alignment and avoid air pockets. Once the neoprene insulation is in place, it’s time to install the EverSoft™ Foam Backed Headliner. This vinyl liner, backed with foam, not only adds a touch of elegance but also enhances insulation and noise reduction within the v-berth.
Step 4: Finishing Touches with EverSoft 3/4″ Hidem Gimp
To achieve a polished and professional look, pay attention to the edges and seams of the headliner. Utilize EverSoft 3/4″ Hidem Gimp, a durable and aesthetically pleasing trim, to neatly cover the edges and create a seamless transition between panels. This finishing touch elevates the overall appearance of your new headliner installation.
By replacing the outdated vinyl headliner in our sailboat’s v-berth, we significantly enhanced insulation, improved aesthetics, and elevated our onboard comfort. The process involves removing the old one, adding closed-cell neoprene sheets for insulation, and installing the EverSoft™ Foam Backed Headliner. We now enjoy the benefits of a visually appealing and thermally efficient space, ensuring a cozy and comfortable retreat during our sailing adventures.

Share this:
- Click to share on Twitter (Opens in new window)
- Click to share on Facebook (Opens in new window)
- Click to share on Pinterest (Opens in new window)
- Click to email a link to a friend (Opens in new window)
- Click to share on WhatsApp (Opens in new window)
Wallcoverings for vessel interiors
By Terri Madden and Alayna Wool
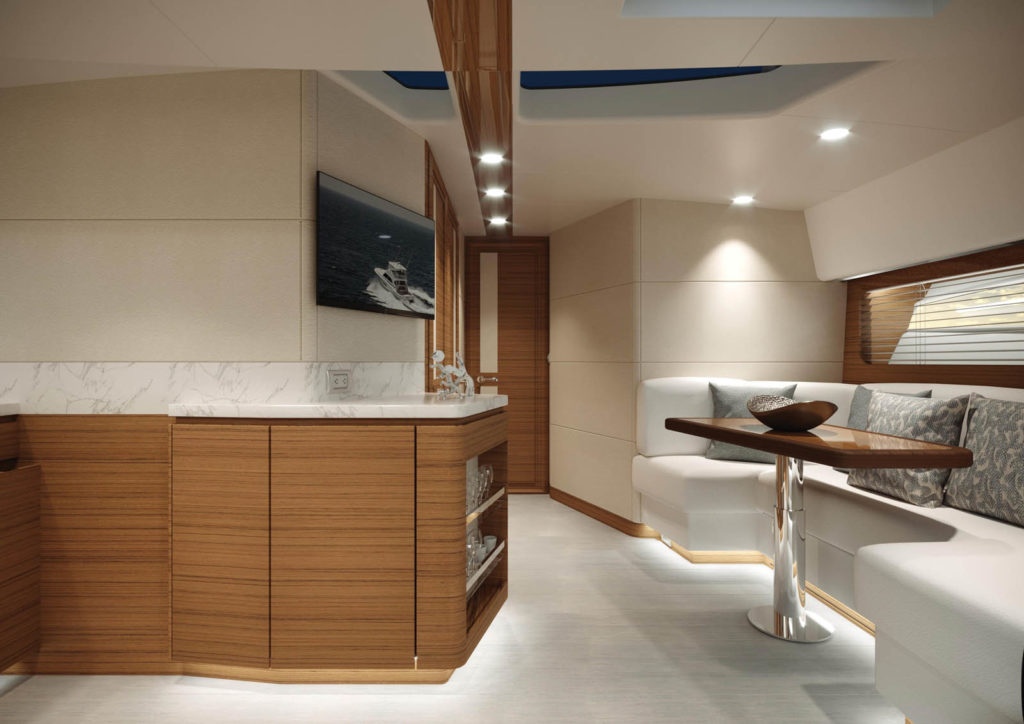
Wall panels and headliners make a statement when entering the saloon of a yacht. Much like the color or texture of the walls of your home, wall panels and headliners are items that cannot be overlooked—especially when they start to sag and age. Fresh wall panels truly enhance the overall appearance of any interior, quickly giving a vessel’s cabin an updated look.
Wall panels offer a visual focal point as well as acoustic tranquility to cabin interiors. The latest vertical and horizontal offerings from a variety of manufacturers are often showcased at international boat shows throughout the year.
Material considerations
A pliable vinyl upholstery fabric with the look and feel of real leather is always a good choice for a headliner or wall panel. An important consideration is whether the final product will include a foam backing. Foam-backed vinyls are easy to clean but will have seams that require covering. We generally use foam-backed materials as headliners or other applications where the material is wrapped around the panel edges and the panels align next to one another.
Be sure to review manufacturer specifications for strength, abrasion resistance, cleaning and maintenance. Quality materials feature topcoat finishes that protect against bacteria and fungus, which is extremely important for marine applications. Manufacturers also offer materials in a multitude of colors and textures to complement boat interiors for a unified look throughout the cabins.
Headliner materials
Headliner fabrics come in a variety of options, including comfortable carpet-type fabrics and the foam-backed vinyls mentioned above.
A “HullBlanket” headliner fabric is a durable, stain-resistant carpet-type material that offers antistatic and moisture-proof properties. This economical material hides irregular hull imperfections and works especially well for vessels under 30 feet.
Vinyl headliners feature a marine vinyl front with or without a foam backing. Most foam-backed vinyls consist of a 3/16-inch foam adhered to the vinyl face. The foam adds a bit of cushion and helps conceal small imperfections in the hull. It can also be cut away to accommodate protrusions like nuts and bolt heads. Manufacturers now offer foam-backed headliner and perforated headliners in many textures and styles. These vinyl headliners create a smooth appearance and are easily wiped clean. Keep in mind that the edges of foam-backed vinyl should be covered, as they will leave a visible foam edge. Because of this, foam-backed vinyl is a great choice for applications where the seams will be hidden under trim pieces or where the material is wrapped around panel edges.

Installation tools and techniques
Do not underestimate the time and effort needed to prep areas for new surface materials. Be sure to remove all original plywood or any other material prior to installing new materials.
Beyond a general spray adhesive, such as 3M ™ General Trim Adhesive, only a few other materials are needed for installing a headliner or wall panels. Marine vinyl without a foam backing can also be used as a hull liner. Apply the spray adhesive to securely adhere the material to the hull, being careful to avoid bubbling or gaps. This is a one-shot process, so you need to get it right the first time. Like foam-backed vinyl, these products are easy to clean but will also have seams that may require covering. We recommend planning the material layout ahead of time on paper to avoid or limit any seams.
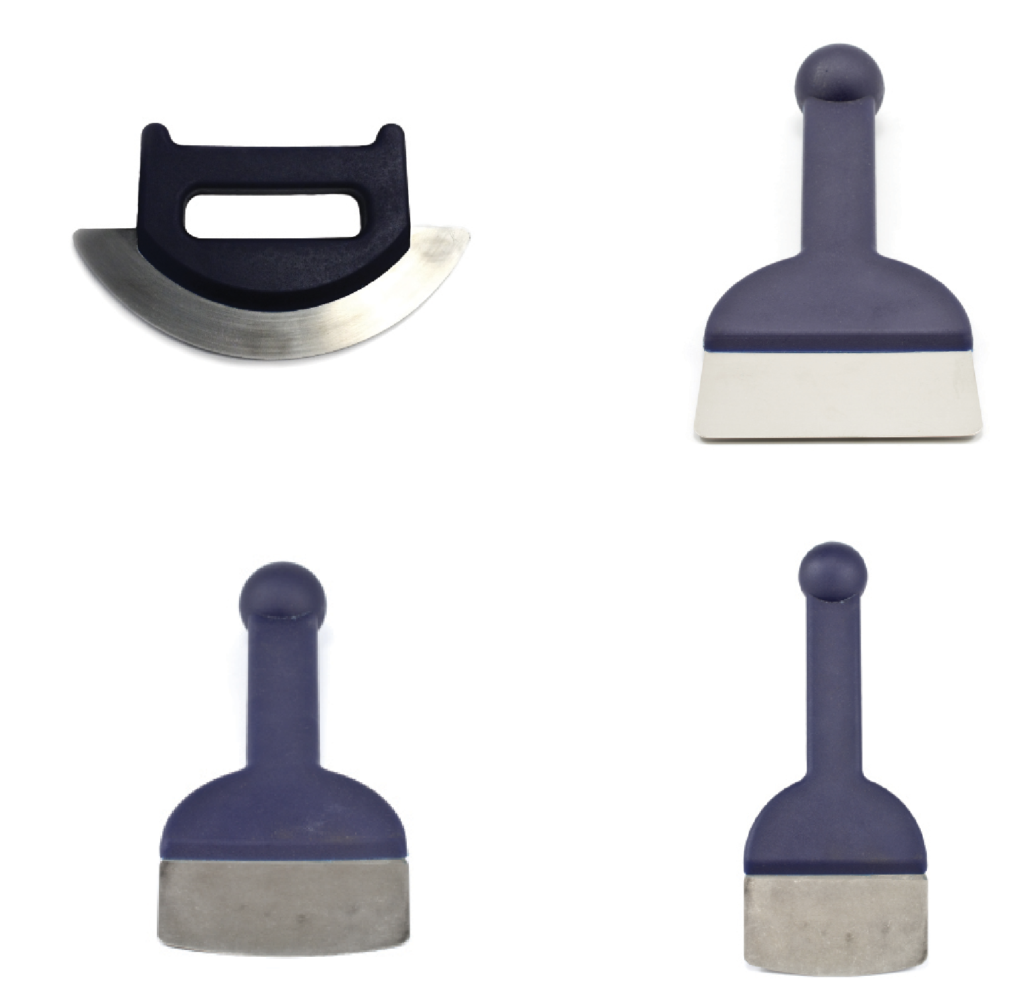
Tools that are lightweight and ergonomically designed with textured, nonslip surfaces make installation easier. Consider tools that include a 45-degree angle to allow for access to tight spaces at close angles. Straightedge tools work well on straight edges for short distances, and a 9-inch “pizza cutter” works well for long runs along either the perimeter or a mid-wall track.
Resources for success
Replacing an existing headliner is relatively simple with proper preparation. In-depth videos, tips and resources for several types of headliner replacements are available online from Sailrite ® at www.sailrite.com.
Various online marine forums are also wonderful resources, which offer in-depth discussions elaborating problems and solutions. These forums include: www.GreatGrady.com, www.whalercentral.com/forum, and www.yachtforums.com.
Terri Madden (LegendTerri) and Alayna Wool (Ms. Alaynious) are a mother/daughter team who co-own Sand Sea & Air Interiors Inc. in sunny San Juan, Puerto Rico. www.sandseaair.com
SIDEBAR: Walls on the water
By Sigrid Tornquist
While textile wallcoverings are gaining momentum in the residential and commercial markets, wallcoverings for marine applications remain vinyl-based. Mildew-resistance, water resistance and cleanability are, of course, paramount. “What changes with wallcoverings for marine applications are the patterns,” says Dave Estiri, co-owner of Sea Furniture, Santa Ana, Calif. (www.seafurniture.com). “We’re seeing more bright colors and geometrics right now.”
Marine wallcovering substrates are typically wood, drywall and fiberglass. For a refit or redesign, the old wallpaper should be removed; walls should be scraped and sanded; and then washed and disinfected in preparation for the wallpaper, Estiri says.
Which primer to use depends on the substrate, according to Spencer Colgan, Tampa Bay Wallpaper Installer, Tampa, Fla. (www.tampabaywallpaperinstaller.com). “Fiberglass would need a different primer that would be more aggressive,” he says.
Vinyl with foam backing used over wall panels is an option, with a typical thickness ranging from 1/16 inch to 3/4 inch. “This is something you see more in older designs rather than in brand-new ones,” Estiri says. “The thing to note with this application is that after the surface is cleaned and conditioned, the foam with the vinyl needs to be backed with mesh so that everything stays together.”
As with any installation, the foundation of success is using well-made materials and stellar techniques. “You need to know what you’re doing and do it right,” Estiri says. “Make sure everything looks as good in five to 10 years as it does the first day.”
Related Posts
Tap into the creativity of your team.

Helping customers choose upholstery materials

Attention to details keep customers coming back

Foam with a flourish
Advanced Textiles Association
1801 County B Rd W, Suite 100 Roseville, MN 55113
+1.651.222.2508 Textiles.org

- [[html title]]
Stay in the loop! Never miss sale announcements, how-to blogs, new product launches, helpful tutorials and more!
Visit our Popular Forums
- Monohull Sailboats
- Multihull Sailboats
- Powered Boats
- General Sailing
- Antares Yachts
- Fountaine Pajot
- Lagoon Catamarans
Cruising Business
- Boat Classifieds
- General Classifieds
- Crew Positions
- Commercial Posts
- Vendor Spotlight
Life Aboard a Boat
- Provisioning: Food & Drink
- Families, Kids, & Pets Afloat
- Recreation, Entertainment, & Fun
- Boat Ownership & Making a Living
- Liveaboard's Forum
Seamanship, Navigation & Boat Handling
- Seamanship & Boat Handling
- Training, Licensing, & Certification
- Health, Safety, & Related Gear
- Rules of the Road, Regulations, & Red Tape
Engineering & Systems
- Const. / Maint. / Refit
- Product / Service Reviews
- Electronics: Comms / AV
- Electrical: Batts / Gen / Solar
- Lithium Power Systems
- Engines & Propulsion
- Propellers & Drive Systems
- Plumbing / Fixtures
- Deck Hdw: Rigging / Sails
- Aux. Equipment & Dinghy
- Anchoring & Mooring
Photo Categories
- Member Galleries
- Life Onboard
- Sailing in the Wind
- Power Boats
- Cruising Destinations
- Maint. & Boat Building
- Marine Life
- Scuba Diving & Divers
- General Photos
Recent Photos

Listing Categories
- African Cats
- view more »
- Crew Wanted
- Crew Available
- Enhance Your Account
- Meet the Mods
- Meet the Advisors
- Signup for The Daily Cruiser Email

| ||||||||||||||||||||||||||||||||||||||||||||||||||||||||||||||||||||||||||||||||||||||||||||||||||||||||||||||||||||||||||||||||||||||||||||||||||||||||||||||||||||||||||||||||||||||||||


COMMENTS
Approximate Yard Time/Cost: This is a straightforward job and shouldn't take a pro more than an hour or so. The national average cost for a marine electronics installer runs about $80 an hour but many have minimums, so you can plan on saving around $100 by doing the work yourself. The problem: ripped dirty headliner.
Best Headliner Material: How to Choose Headliner Fabric. Item # X-HT-300174. This simple fabric refresh can help to modernize and update your vehicle. There's not a lot of natural light in a boat cabin or RV interior. Removing and replacing dingy, worn-out headliner can also greatly increase the brightness and make your small space appear larger.
3: Any stubborn patches can be loosened with a hot-air gun. 4: Before removing a panel, clearly mark its position and orientation - in this case, port lower, with the arrow pointing towards the bow. The hatch trim is unscrewed, and the side facing the bow marked with pencil so the screw holes can be relocated.
A headliner is the material that covers the interior ceiling of your boat's cabin, providing insulation, soundproofing, and a clean, finished appearance. Over time, headliners can become damaged, stained, or simply outdated, making it necessary to replace them.
Sail track guides, hatches, putting hoses on fittings. Really an excellent all around product. It doesn't stain the headliner The putty knife is a perfect tool, but the friction of trying to get the material back in the track can lead to ripping, etc. The Teflon makes it just pop back in with zero resistance. Just run a thin bead. It's all ...
Carovina said: I recently bought a 21' 1981 Edel sailboat and the head and hull liner need replacing. Congratulations and good choice. The Edel 665 is decently fast, forgiving, and built better than most boats twice her length. I have fond memories of cruising in one with my father on the North Channel of Lake Huron.
How to install a foam backed vinyl headliner in a boat will give you all the steps needed to remove an old headliner and prepare the surface for new foam bac...
Hunter 33 Georgian Bay, Ontario, Canada. Nov 1, 2016. #2. Jackdaw said: 3M 38808 Headliner Adhesive. Spray both the material and the underside several times per the instructions, and stick it back up. Jack, The headliners in that year were not glued in place. I did this couple years ago to install an additional clutch on the coach roof for the ...
We show you how to fix a sagging headliner. This method works every time and holds the liner up for years. ALERT!!THROW OUT your WD-40, PB Blaster along with...
http://search.sailrite.com/?freeText=headliner How to install carpet style headliner or hull liner in your boat. This video will show you the steps needed to...
In the video below we explore the process of replacing the worn-out and inefficient vinyl headliner in our sailboat's v-berth. The existing headliner lacked insulation, leaving the V-berth vulnerable to temperature extremes. By removing the old one, adding insulation using closed-cell neoprene sheets, and installing a high-quality EverSoft ...
296. Cal Cal 33-2 cape cod. Nov 10, 2020. #8. Best things about project, 1) Access to stuff underneath (check bolts, through deck stuff) 2) Easy to upgrade lights 3) Change color/upgrade look. The project took a couple of days, you'll need good templates, jig-saw, and patience. Very doable.
A "HullBlanket" headliner fabric is a durable, stain-resistant carpet-type material that offers antistatic and moisture-proof properties. This economical material hides irregular hull imperfections and works especially well for vessels under 30 feet. Vinyl headliners feature a marine vinyl front with or without a foam backing.
Marine Projects. Installing Removable Cabin Headliner in a Boat. Have a question? Be the first to ask. Ask a question. Stay in the loop! Never miss sale announcements, how-to blogs, new product launches, helpful tutorials and more! If your removable cabin headliner needs revamped, this is the DIY for you.
The headliner inside my boat was falling out when I bought it, the foam backing had disintegrated with age. I have removed it and sanded down the glue and fiberglass behind it to a fairly smooth ... The good news is that the panel are easy to fit, easy to replace, if damaged, and easy to remove to look for any hardware leaks that get buried. 02 ...
Back in the 1970s and 1980s, many sailboats were finished with foam-backed vinyl headliners glued directly to the underside of the deck and coachroof molding. If you own such a boat, you're likely to be well acquainted with the problem of the headliner coming adrift as the glue and foam interface breaks down.
Nov 7, 2012. #2. I am replacing the liner in the Luger with foam backed headliner material. I will bond with spray adhesive the headliner material to some 1/4" thick corrugated plastic panels. I picked up some at a surplus yard 2'x8' panels for $2 a piece. The headliner was also inexpensive at $10/yd, material is 72" wide.
43. Central Florida. Boat Info. Sea Ray 340 EC. Engines. 2 X 340hp 454's. Stupid Quicksilver 6.5 Gen. Have an'89 340EC with the usual stains from leaking port holes etc. Pulling the boat out soon and will repair all windows and porthole, window, rub rail, bow rail anchor holes etc. When this is all complete I want to replace the headliner in ...
Cabo Boat Suede Fabric | Royal Blue 56 Inch (YD) GLS Stock #: 1026569-GK662. $16.01 $17.99. Add to Cart. Wishlist. Show. Sort By. Keep your boat's upholstery in top condition with boat headliner replacement fabric from Great Lakes Skipper. Browse online today, limited quantities.
http://www.sailrite.com/Installing-Removable-Cabin-Headliner-in-a-Boat-VideoInstalling Removable Cabin Headliner in a Boat Video is a great how-to video on r...
You can do that on bare fiberglass, but not the overlapped blanket. Probably last post on the headliner. A look at the Galley area, and some of the special steps I took here. That foam really made a difference. Two strips of 1/4 inch closed cell foam, 4x36 inches. I bought it at an foam shop (yes there are such things) in Minneapolis, the two ...
This engineered "composite" vinyl plank and trim may be heat formed to conform to the shape of the boat, and is perfect for upgrading the hull liner of the galley, messroom, berth or head. These waterproof boards and mouldings are ideal for interior applications and not intended for exterior use. Bacterial Resistant ASTM-G2276.
Changing out the headliner or interior walls of your boat? Part 19 of the TACO Marine Project boat provides three time-saving tips for installing headliners ...